
If you don’t know what a xDrip device is take a look at this page.
 Since the release of my first comment about xDrip on Sunday morning my Facebook and Twitter notifications have gone crazy: ‘like’s everywhere, comments everywhere, questions everywhere. At stages I’ve been overwhelmed with my phone buzzing with notifications ten to the dozen and me not getting the time to answer the questions. This just goes to prove the level of interest in a set up like this.

By far the biggest questions I have been asked are:
1. can I really build this myself as I’ve never soldered before?
2. what components do I need?
3. where can I buy these components?
The answer to 1 is easy: Yes, you probably can, I had never soldered anything electrical before starting this project, in fact I had to buy a soldering iron/kit just for this.
The rest of this blog should answer questions 2 and 3.
b) xDrip is a DIY product, decide for yourself if you wish to use it. Build it, test it, test it again and use (if you want to) in conjunction with a certified receiver.
c) The fact that it is working for us does not mean it’s right for you.
d) Never build a xDrip for anyone else and never sell one.
e) The blogs are provided for information only. We are not endorsing it for use by others, nor promoting it, just merely publishing our information as well as answering questions from previous blog articles.
Components you’ll need to buy, borrow or steal
(Okay, don’t steal, that’s not good.)
Thank you to Johan Lorant from the USA for information about the components he bought.
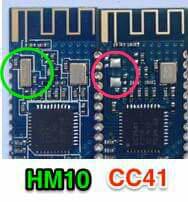 UPDATE WARNING
It seems there’s two types of chip being passed of as HM10, the second actually being a CC41 and it appears these will not work, although some do.
Be careful which one you get, check with the supplier before you order one but bear in mind that that supplier will only know what their supplier told them. Best thing is to get a proper photo of them beforehand and make sure it’s a HM10 as per the picture on the right.
 Bluetooth Low Energy 4.0 BLE Tranceiver HM-10 Module
From eBay seller AudioSpectrumAnalyzers I’ve got a working HM10 (see warning above), in fact he even has ‘xdrip’ in the items listing title. Cost: under £12.
The first one I bought was off eBay for £15.29 from Aura Communications.
 The heart of the xDrip device is the WIXEL chip.
I got mine – along with lots of stuff – from Hobby Electronics.
Cost: £13.80
In the USA, one place to get it from is from Jaycon Systems:
JS-3237 Wixel Programmable USB Wireless Module
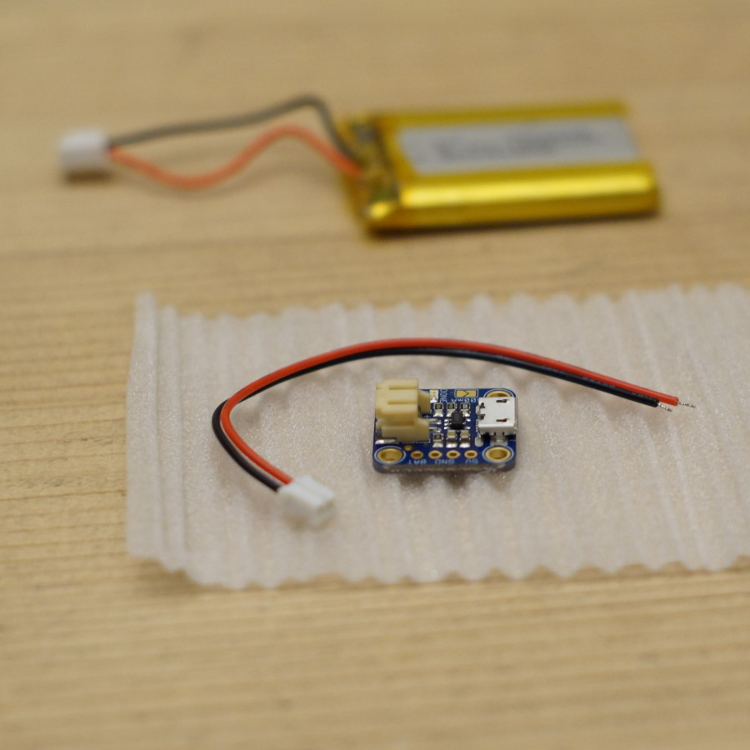 AdaFruit LiPo (Lithium-ion Polymer battery and MicroUSB charger.
I got the charger from eBay for £7.70 each, I bought two. An alternative is Pimoroni at £7.
I got the battery from eBay too, 1200mAh ones, although note that Stephen (the designer of xDrip) only uses a 500mAh battery.
In the USA one place to get from is Jaycon Systems
JS-1965 Micro-USB Lipo Charger (MCP73831)
JS-3418 3.7 Volt Rechargeable Lithium Battery (850 mAh)
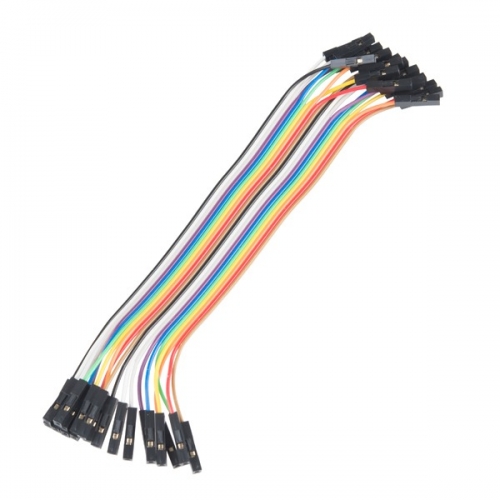 You’ll need some wires to link it all together. I bought these and cut them in half as I’m going to build another xDrip.
Cost: £2
In the USA one place to get these from is Jaycon Systems
JS-3958 Flat Ribbon Cable – 16 Wire (15 Ft) 1
 Having never soldered before I was in need of a few things, all of which I found in this kit. Note that everything works well apart from the solder, buy some good stuff elsewhere.
The ‘magic hands’ and magnifying glass were a Godsend, I couldn’t have done without them.
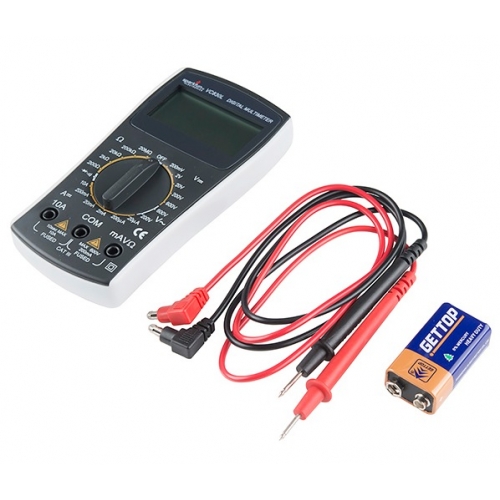 I wouldn’t be without my multimeter when dealing with electrical stuff but you don’t actually need one. I used one for the first xDrip I built but not for the 2nd or 3rd which I use as spares in demos.
Cost: £10 or so, from any DIY or electronic hobbyist store, such as HobbyTronics.
I was able to get the HM-10 CC2541 working in my dexdrip. I had to update the firmware from this site: http://jnhuamao.cn/download_rom_en.asp?id=1
It was a process to accomplish this, and I thought I had bricked it (made it unusable) at first.
In short, you have to load the USB-to-serial wixel app so the wixel can be used to program the HM-10. Use a terminal to issue the update command. Then use the HMSoft.exe program to load the HMSoft.bin firmware file. It appears they have made the code compatible with both the CC2540 and the CC2541 chips.
Greg
Hi Greg,
Excellent news. I’ve now ordered an HM-10 from Aura. The description is a little ambiguous & I suspect it may be a CC2541.
I see the firmware upgrade on the linked page but where do you get the USB-to-Serial wixel app you refer to?
Any help would be greatly appreciated.
Regards,
Robert
Pololu has the USB to Serial wixel code here: https://www.pololu.com/docs/0J46/9.c
Also on GitHub here:
https://github.com/jstevensog/wixel-sdk/blob/master/apps/usb_serial2/usb_serial2.c
He actually has lots of apps here:
https://github.com/jstevensog/wixel-sdk/tree/master/apps
Greg
Thank you. However @StephenIsTaken has uploaded a version of xDrip in the experimental area which works with CC2541. I have it running right now!
Hi!, You can buy the genuine HM-10 for 7 GBP from dx.com in uk.
A bit of a dummy Q! (All the components are with a friend to solder) how does the charger work? Does it need to be plugged into something? Ive just bought the one battery – is it worth having a spare yo swap out?
The smallest board you’ve bought is the link between the battery and the Wixel and has a micro-USB port. This is where you charge it, it charges the battery and when the green LED appears it’s fully charged. After the power (into the micro-USB port) is disconnected the soldering xDrip will run from battery power. Hope this helps.
Thanks for the response Kev, it did have an orange light but we got a little confused as I read that it had to be blue! I guess everyone’s setup is different. All done now though and it’s working! Son has had two nights where he could go to sleep without setting an alarm on his clock as the uploader phone has a old ring (he doesn’t wake up to the dexcom alarms 🙁 ) often when he is hypo it takes a while to get him to wake. I really appreciate all the info in this blog, it’s helped me no end. Many thanks, Donna.
Would you just build me one and I’ll pay you for it
Sorry Shane but no, this is DIY stuff you must Do It Yourself so you understand it if anything should go wrong…and more importantly no-one other than yourself is liable for any issues. You can of course buy an almost-ready kit from xdripkit.co.uk, then solder that together.