A Dummy’s Guide to Building an #xDrip – #WeAreNotWaiting

NOTE: xDrip used to be called DexDrip so you might find some references to the old name in this article.


If you don’t know what a xDrip device is take a look at this page.

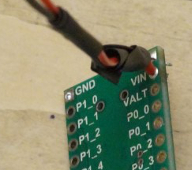
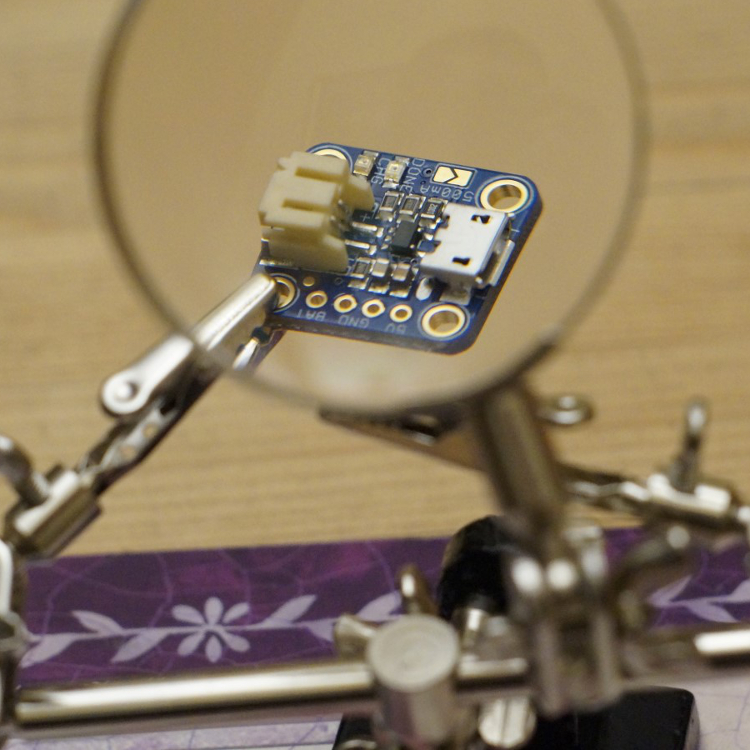
AdaFruit charger magnifiedI was tickled by someone on Reddit who linked to yesterday’s blog about the components required for a xDrip which was entitled “An “Amateur” builds a module for DexDrip”. So here it is, this amateur’s guide to building an xDrip/DexDrip. (The article actually referred to DexDrip as that what xDrip was called at the time.)

Interested in further posts about this subject? Why not like this blog’s Facebook page and get notified of updates, or click ‘Follow’ using the button at the bottom-right of this page.

PLEASE READ THIS ADVISORY

a) Never make a medical decision based on a reading from any CGM device, whether certified (eg Dexcom) or not (eg xDrip). Always perform a fingerstick blood glucose check first.
b) xDrip is a DIY product, decide for yourself if you wish to use it. Build it, test it, test it again and use (if you want to) in conjunction with a certified receiver.
c) The fact that it is working for us does not mean it’s right for you.
d) Never build a xDrip for anyone else and never sell one.
e) The blogs are provided for information only. We are not endorsing it for use by others, nor promoting it, just merely publishing our information as well as answering questions from previous blog articles.
A baptism of fire heat
Although I received lots of offers of help to solder the components together the guys at work told me I’d have no trouble doing it myself, so I decided to try.
First I ordered the soldering kit (iron, solder, stand, helping hands, solder sucker) from eBay and a practice board to train myself with. The ‘helping hands‘ turned out to be worth their weight in gold.
I soldered my first pin, inspected it and then soldered three more, choosing to solder them right next to each other as it seems that a common problem for amateurs is putting too much solder on. With four pins soldered I tested everything for continuity issues, to make sure no excess solder had spilled on to the adjacent contacts and shorted anything out.

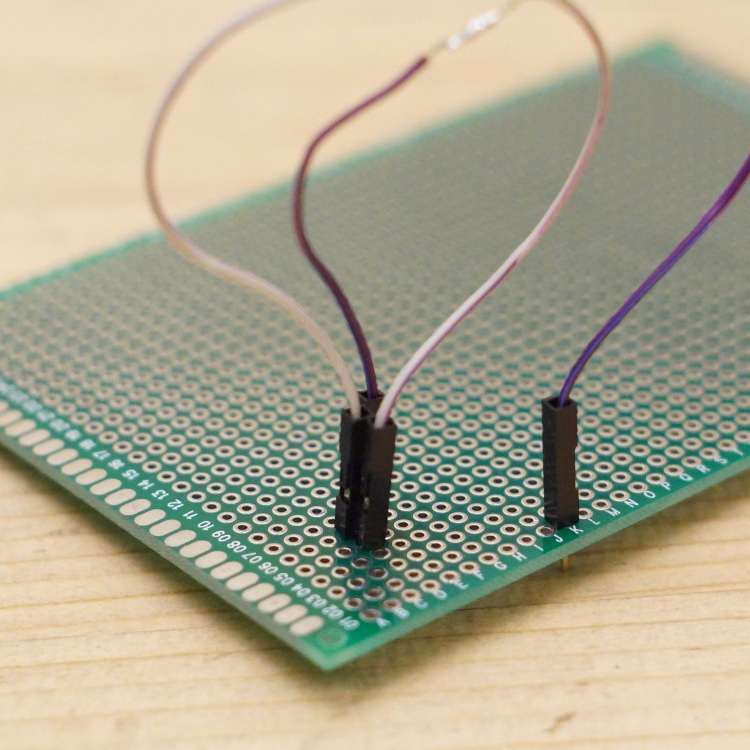
practice board face uppractice board face down
So far, so good.
AdaFruit LiPo charger and batteryAttach LiPo-charger connector to battery
My AdaFruit LiPo-charger came with a connector, my battery came with a connector; they weren’t the same.
First job then was to cut the wires from each and solder the battery wires to the LiPo-charger connector.
NOTE: some people remove the connector terminal on the LiPo-charger and solder directly onto the charger board, I didn’t fancy this as I like to be able to disconnect batteries and swap them easily.
DO NOT connect battery to LiPo-charger.
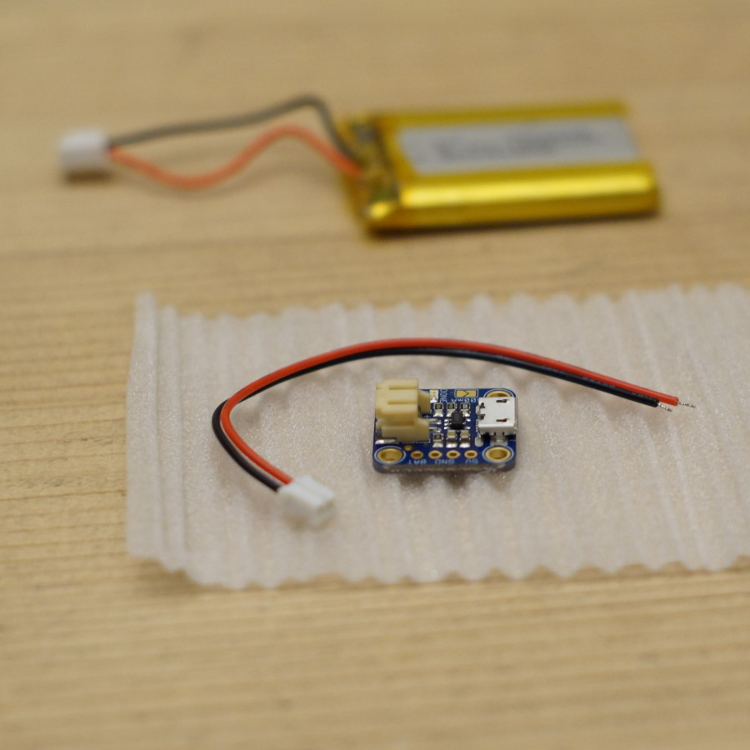
AdaFruit charger magnifiedSolder wires to AdaFruit charger
The AdaFruit Li-Po battery charger then needed a power (red) and ground (black) wiring up.
For my first try I soldered a four-piece-header-pin to the board and used jumper wires to connect to it, but within a week I removed the header pins & soldered the wires directly onto the PCB.
1. Red wire, solder on to 3.3v (marked as BAT on mine), first on the left as we look at that board. Make sure you don’t solder on to the 5v connector.
2. Black wire, solder on to one of the GND connectors, for ease I chose the 3rd from the left.
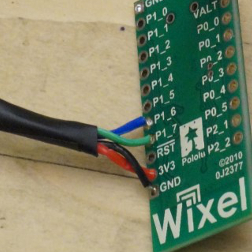
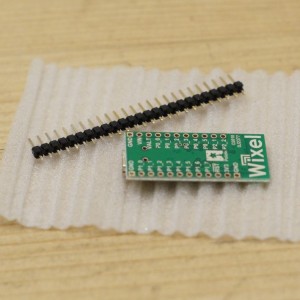
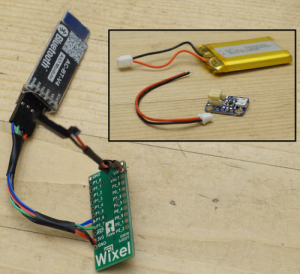
WIXEL bluetooth wiresConnect wires for bluetooth module to WIXELWIXEL face down
Prepare four wires (red, black, green, blue) with one female header pin at one end and bare wire for soldering at the other.
1. Black, solder to GND
2. Red, solder to 3V3
3. Blue, solder to P1_6
4. Green, solder to P1_7

Other possible options: The header pin option is the simplest way to connect from WIXEL to HM-10.
The hardest (but not too bad) option is to desolder the HM-10’s header pins, then solder wires with two bare ends onto the WIXEL and to the HM-10.
The middle option is to solder wires with two bare ends, one end onto the WIXEL and one bare end onto the relevant header pin on the HM-10. Whilst this might seem easy I think it’s simpler to desolder the HM-10s header pins as above.

WIXEL and BLEConnecting the HM-10 Bluetooth moduleBLE face down
What you do next depends on what you chose to do on the ‘Connect wires for bluetooth module to WIXEL’ step:
If you soldered wires with female header connector at one end when you did the step above then all you need to do next is to slide the correct colour wire’s connector onto the correct HM-10 pin as per the diagram here.
If you soldered wires with two bare ends and left the header pins on the HM-10 then you need to solder the bare wire ends to the correct HM-10 header pin as per the diagram here. This is tricky to do (for me) but not impossible as I found when I made a second xDrip. I choose to wrap electrical tape around each soldered pin/wire afterwards.
If you soldered wires with two bare ends and removed the HM-10 header pins then just solder the bare ends onto the HM-10 as per the diagram here.
WIXEL power wiresSolder LiPo-charger wires to WIXELWIXEL face down
With the LiPo-charger disconnected from the battery (and micro-USB power) you now need to solder its wires to the WIXEL.
Red, solder to VIN
Black, solder to GND
 
The finished product
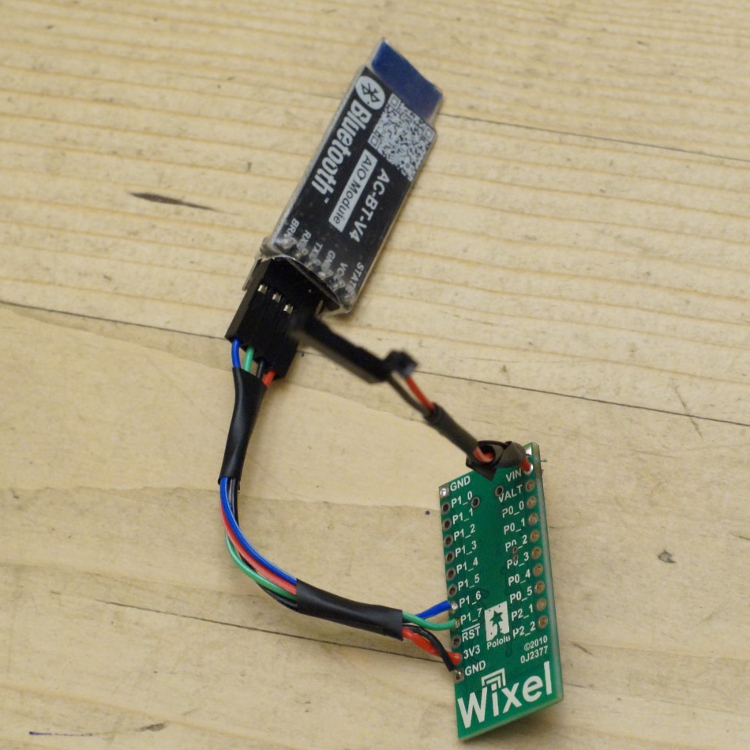
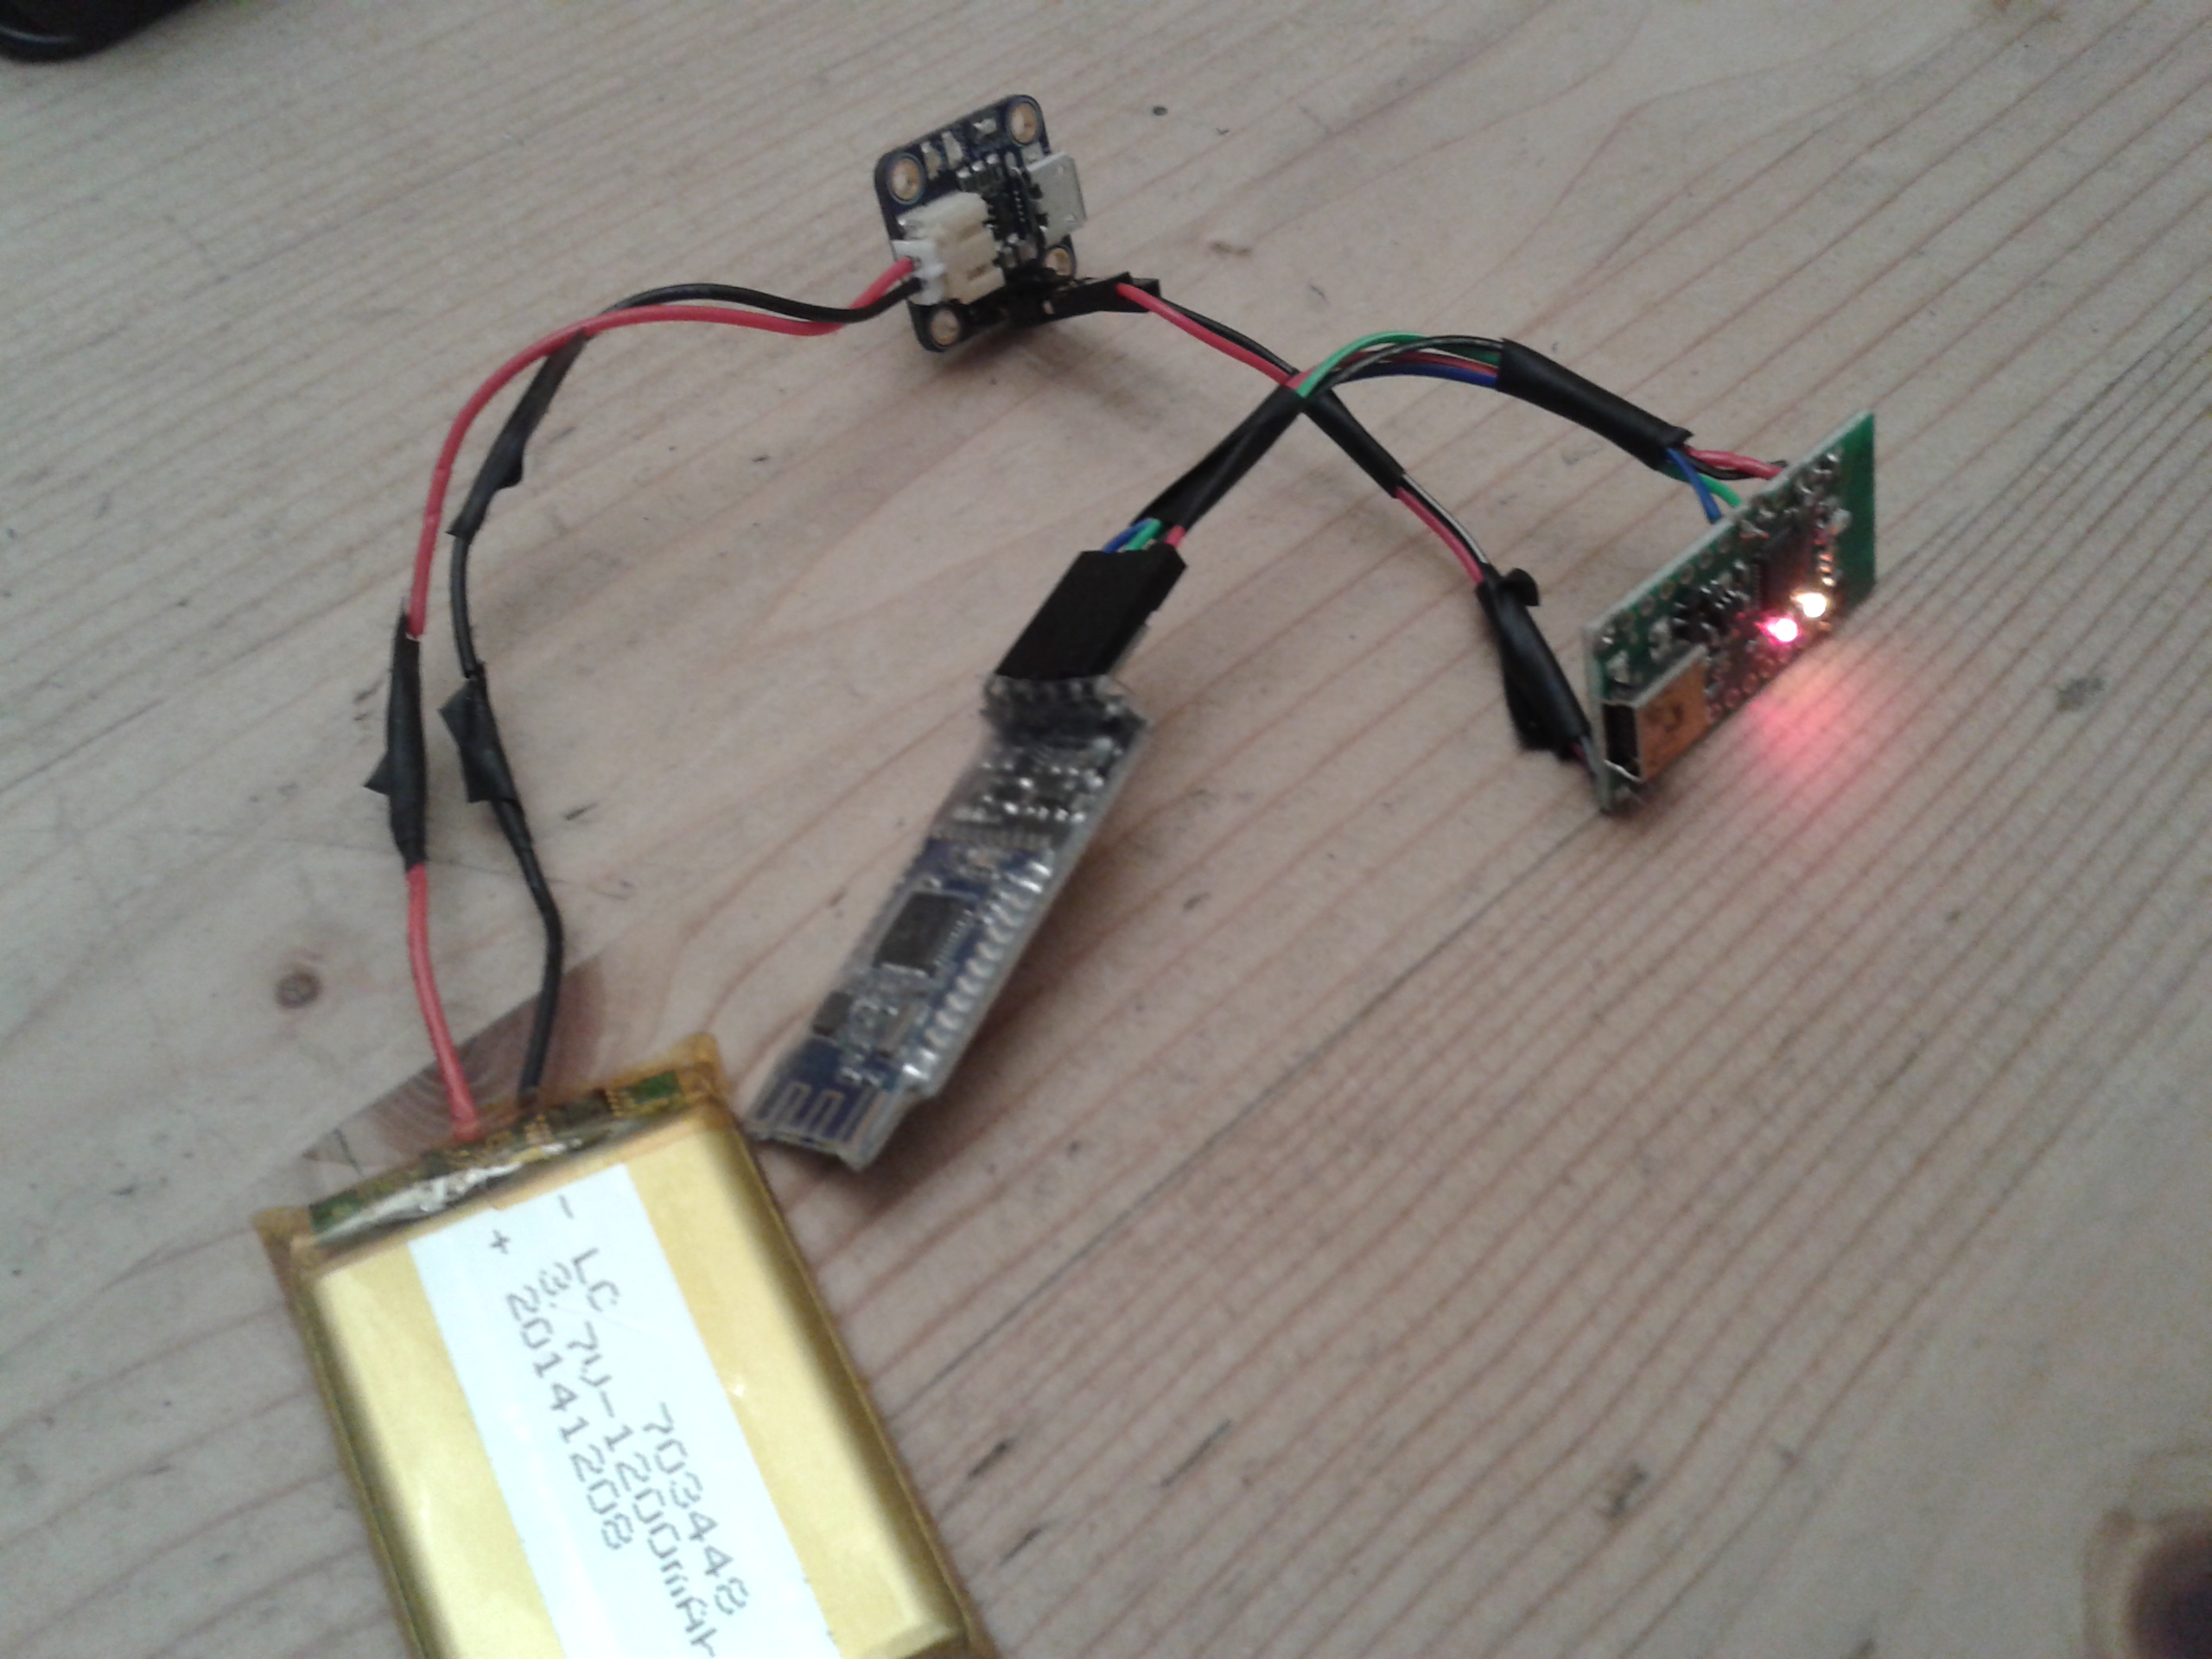
Hopefully by the end of it you’ll have something that looks like this:
20150109_205710
Note: the picture shows header pin connections for the AdaFruit Li-Po charger but I’ve now soldered the wires directly to the board, it now has a much smaller footprint.
 
Interested in further posts about this subject? Why not like this blog’s Facebook page and get notified of updates, or click ‘Follow’ using the button at the bottom-right of this page.

#WeAreNotWaiting thanks to #xDrip – Components Required

NOTE: xDrip used to be called DexDrip so you might find some references to the old name in this article.


If you don’t know what a xDrip device is take a look at this page.

partially made up xDripSince the release of my first comment about xDrip on Sunday morning my Facebook and Twitter notifications have gone crazy: ‘like’s everywhere, comments everywhere, questions everywhere. At stages I’ve been overwhelmed with my phone buzzing with notifications ten to the dozen and me not getting the time to answer the questions. This just goes to prove the level of interest in a set up like this.

By far the biggest questions I have been asked are:
    1. can I really build this myself as I’ve never soldered before?
    2. what components do I need?
    3. where can I buy these components?

The answer to 1 is easy: Yes, you probably can, I had never soldered anything electrical before starting this project, in fact I had to buy a soldering iron/kit just for this.

The rest of this blog should answer questions 2 and 3.

Interested in further posts about this subject? Why not like this blog’s Facebook page and get notified of updates, or click ‘Follow’ using the button at the bottom-right of this page.

PLEASE READ THIS ADVISORY

a) Never make a medical decision based on a reading from any CGM device, whether certified (eg Dexcom) or not (eg xDrip). Always perform a fingerstick blood glucose check first.
b) xDrip is a DIY product, decide for yourself if you wish to use it. Build it, test it, test it again and use (if you want to) in conjunction with a certified receiver.
c) The fact that it is working for us does not mean it’s right for you.
d) Never build a xDrip for anyone else and never sell one.
e) The blogs are provided for information only. We are not endorsing it for use by others, nor promoting it, just merely publishing our information as well as answering questions from previous blog articles.

Components you’ll need to buy, borrow or steal
(Okay, don’t steal, that’s not good.)
Thank you to Johan Lorant from the USA for information about the components he bought.

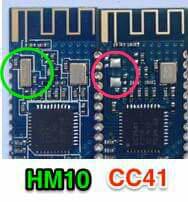
HM10 v CC41UPDATE WARNING
It seems there’s two types of chip being passed of as HM10, the second actually being a CC41 and it appears these will not work, although some do.
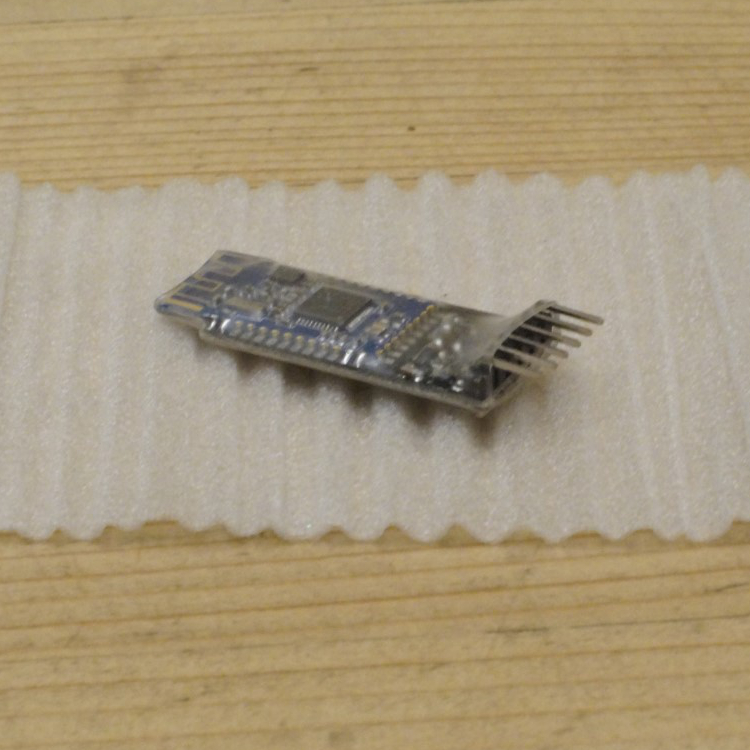
Be careful which one you get, check with the supplier before you order one but bear in mind that that supplier will only know what their supplier told them. Best thing is to get a proper photo of them beforehand and make sure it’s a HM10 as per the picture on the right.
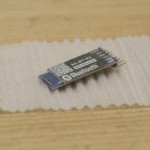
BLE face upBluetooth Low Energy 4.0 BLE Tranceiver HM-10 Module
From eBay seller AudioSpectrumAnalyzers I’ve got a working HM10 (see warning above), in fact he even has ‘xdrip’ in the items listing title. Cost: under £12.
The first one I bought was off eBay for £15.29 from Aura Communications.
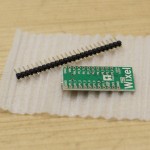
WIXEL face downThe heart of the xDrip device is the WIXEL chip.
I got mine – along with lots of stuff – from Hobby Electronics.
Cost: £13.80
In the USA, one place to get it from is from Jaycon Systems:
JS-3237 Wixel Programmable USB Wireless Module

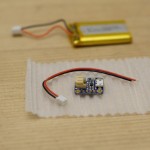
AdaFruit LiPo charger and batteryAdaFruit LiPo (Lithium-ion Polymer battery and MicroUSB charger.
I got the charger from eBay for £7.70 each, I bought two. An alternative is Pimoroni at £7.
I got the battery from eBay too, 1200mAh ones, although note that Stephen (the designer of xDrip) only uses a 500mAh battery.
In the USA one place to get from is Jaycon Systems
JS-1965 Micro-USB Lipo Charger (MCP73831)
JS-3418 3.7 Volt Rechargeable Lithium Battery (850 mAh)
jumper-wires-ff-6in-500x500You’ll need some wires to link it all together. I bought these and cut them in half as I’m going to build another xDrip.
Cost: £2
In the USA one place to get these from is Jaycon Systems
JS-3958 Flat Ribbon Cable – 16 Wire (15 Ft) 1
SolderingkitHaving never soldered before I was in need of a few things, all of which I found in this kit. Note that everything works well apart from the solder, buy some good stuff elsewhere.
The ‘magic hands’ and magnifying glass were a Godsend, I couldn’t have done without them.
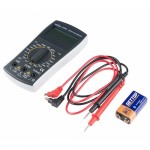
digital-multimeter-basic-500x500I wouldn’t be without my multimeter when dealing with electrical stuff but you don’t actually need one. I used one for the first xDrip I built but not for the 2nd or 3rd which I use as spares in demos.
Cost: £10 or so, from any DIY or electronic hobbyist store, such as HobbyTronics.
Interested in further posts about this subject? Why not like this blog’s Facebook page and get notified of updates, or click ‘Follow’ using the button at the bottom-right of this page.

#WeAreNotWaiting thanks to #xDrip – Introduction

xDrip logo on left, Nightscout logo on right
As you can see xDrip loves Nightscout
NOTE: xDrip used to be called DexDrip so you might find some references to the old name in this article.


Okay, I’ll own up, I know I shouldn’t be so excited about this but I am.
This is a game changer, for us and many, many more.
It proved its worth within 24 hours when I saw Amy was hypo whilst sleeping (see below). Amy wouldn’t have woken up and tested her blood glucose for another 4 or 5 hours but by having xDrip working I saw that she needed some glucose tablets to raise her blood glucose levels. 5 minutes later she was back asleep…for four more hours. #Teenagers!

Interested in further posts about this subject? Why not like this blog’s Facebook page and get notified of updates, or click ‘Follow’ using the button at the bottom-right of this page.

PLEASE READ THIS ADVISORY

a) Never make a medical decision based on a reading from any CGM device, whether certified (eg Dexcom) or not (eg xDrip). Always perform a fingerstick blood glucose check first.
b) xDrip is a DIY product, decide for yourself if you wish to use it. Build it, test it, test it again and use (if you want to) in conjunction with a certified receiver.
c) The fact that it is working for us does not mean it’s right for you.
d) Never build a xDrip for anyone else and never sell one.
e) The blogs are provided for information only. We are not endorsing it for use by others, nor promoting it, just merely publishing our information as well as answering questions from previous blog articles.

partially made up xDripSo what is xDrip?
xDrip is a combination of a device and a software application which receives data sent out by a Dexcom G4 CGM transmitter/sensor and displays the glucose readings on an Android phone. The app can also upload it’s data for use by Nightscout, which in turn means glucose readings are available on the internet via a PC/Mac, phone or even a smart watch (Pebble etc.).
xDrip is made up of two things:
1. The first is a do-it-yourself device, made up of four components which you can buy off the Internet and solder together. Total price is about £40 including battery. (That’s a partially made device on the right).
2. The second is the xDrip application which runs on Android phones (4.3+above with Bluetooth Low Energy (BLE) support). The app uses the xDrip device to read the output from a Dexcom CGM (continuous glucose monitor) sensor/transmitter. xDrip links up to existing Nightscout databases. The xDrip app can feed the data to a Nightscout database, which in turn means the data can be accessed via the Internet practically anywhere, using a PC/Mac, laptop, smartphone (Android/IOS/Windows) or better still a SmartWatch.

Wait! What? Nightscout? BLE? CGM? Dexcom? Animas?
Okay, it’s probably a good time to go over some of the common words I’ve used in the article. I’ll presume you’re already aware of insulin, insulin pumps, glucose levels and the world of Smartphones.
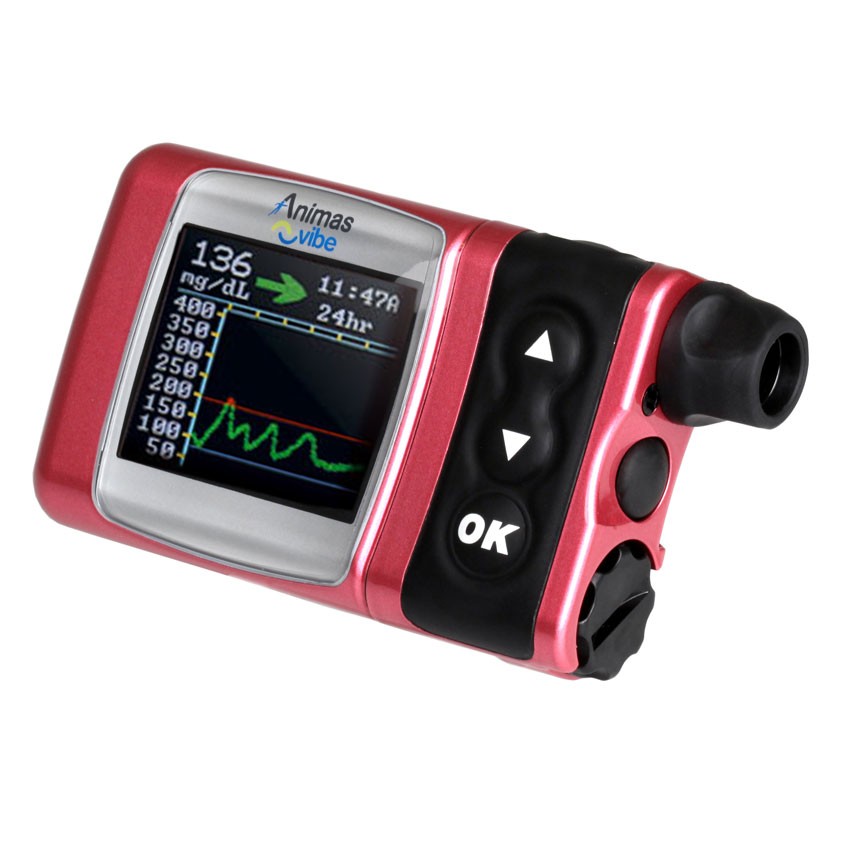
Animas – Animas is a company that makes insulin pumps. My daughter Amy has been using one of their pumps – called the Vibe (yeah, yeah, I know!) – since since June 2013. We chose the Animas Vibe specifically because of it’s use of Dexcom’s CGM system, although it turned out to be a whole year before we got the chance to use CGM.
BLE – is a version of the Bluetooth communication protocol which uses a low amount of energy, which means devices can work for longer without charging. Android has built-in support for BLE from version 4.3 onwards.
CGM – Continuous glucose monitor. A device which regularly samples the glucose level of its wearer, sampling the glucose in the interstitial fluid, not the blood. If you’re new to CGM perhaps take a look at this blog of mine: CGM: we’re live with Animas/Dexcom.
CGM-in-the-Cloud – is a term for any CGM which can be connected to a web site to allow for remote monitoring of someone’s glucose levels. It’s pretty big in USA, not so much over in Europe. A big player in this is Nightscout (see below).
Dexcom – Dexcom is one of many manufacturers of CGM systems. We use Dexcom because it’s linked with Amy’s Animas Vibe pump, if we’d got a Medtronic pump we’d use their Enlite CGM system. One benefit of Dexcom’s CGM appears to be that the sensors last longer – which is a big thing for us (who pay for CGM ourselves) as it lowers the total cost of using CGM. For the record I don’t believe Dexcom is any better than the new Medtronic Enlites.
Nightscout – Nightscout is “an open source, DIY project that allows real time access to a Dexcom G4 CGM from web browsers via smartphones, computers, tablets, and the Pebble smartwatch. The goal of the project is to allow remote monitoring of the T1D’s glucose level using existing monitoring devices.” In short Nightscout and the people behind it are awesome.

Who should we thank for xDrip?
Not me that’s for sure.
xDrip is the brainchild of Stephen Black, who was recently diagnosed with Type 1 Diabetes. With the help from others in the CGM-in-the-Cloud community Stephen has designed the xDrip device and written the software.
I think he deserves a big round of applause.

So how does it work?
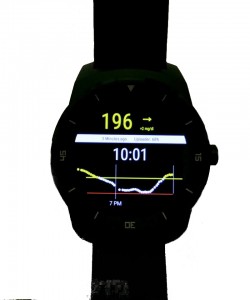
SmartWatch

  • Dexcom sensor reads glucose level
  • Dexcom transmitter sends out data from sensor, like a split second radio broadcast
  • The xDrip app (on Android phone/tablet) controls the xdrip device to listen for and receive the Dexcom data.
  • The app displays information about the person’s glucose levels now and over the last day or so, indicating whether it rising or falling or staying level
  • If required the app can upload the data to a Nightscout database. We didn’t do this initially but set it up within the first week.
  • If using Nightscout parents (etc.) can view Nightscout info on a PC/website/smartwatch, like on the right. I’ve seen some great pictures of parents looking at their kid’s glucose level being displayed on the parent’s Pebble watch whilst the kid does some activity with their friends.
  • A further step is the use of another Android/smartphone application named Nightwatch, also written by Stephen. It relays information from the Nightscout data onto a secondary phone and potentially on to a smartwatch.

That’s Stephen’s SmartWatch above/right, showing the glucose levels on mg/dl (so don’t panic UK people).

Stuff you’ll need before using xDrip

  • Dexcom G4 CGM system, including transmitter and sensors.
  • An Android phone or tablet running version 4.3 or above and the ability to use BLE.
  • Components for the xDrip device (Wixel (£14), LiPo battery (£6) and charger (£6), BLE module (£15) and some wires to link it all together.
  • A case to put all the components in. (Yes I really must buy a case soon.)
  • A soldering iron or a friend/relative with one. I bought one off eBay for £12 including the iron, solder, iron stand/sponge and magic hands with magnifying glass.
  • A bit of patience. I didn’t have any but on reflection it would probably be a good thing.

In this next blog I detail the components I bought, which are pretty much the same components Stephen Black (the creator of xDrip) used.

Is this really a do-it-yourself project?
Yes. Definitely.
Before starting on this project I had never soldered any electrical components, I even had to buy a soldering kit specifically for this. Fair enough I program computers for a living but in this case my knowledge actually hindered my progress as I looked for a complicated solution to a problem I didn’t actually have. Luckily Stephen was on hand (via Twitter) to help me through it.
Soldering wise I’d say I spent a couple of hours in elapsed time making up the device, but that’s only because I was taking it very slowly to make sure I got nothing wrong. I’d imagine anyone with soldering experience would have this done in a few minutes.
If you don’t feel you can solder the components together why not ask a friend, relative or colleague?
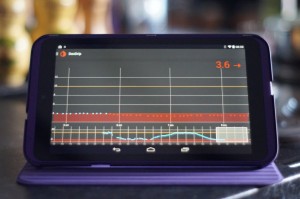
xDrip's first 'catch'A real life example
With the xDrip device in Amy’s room, we checked that our tablet’s xDrip app could communicate with it when in our bedroom and also when downstairs in the kitchen; it could.
Off to bed we all went, everyone drifting off quick quickly, except me as I was busy staring at a tablet mesmerised by the information in front of me. (I really hope that’s a first night thing!)
At 7am I woke up and went downstairs, taking the tablet with me but not looking at it, placing it on charge in the kitchen, underneath Amy’s bedroom. I heard a noise and presumed it to be a mobile getting a Facebook notification or something. Then it happened again.
I realised it was Amy’s Animas Vibe pump vibrating to tell her that something wasn’t great, it was right she was low. Amy was fast asleep with the pump lying on the mattress beside her, she couldn’t feel it, it didn’t wake her. On the other hand I was in the room underneath and heard it, the vibration going through the mattress, down the bed itself, onto the floorboards, through the joists and onto the ceiling below!
So I checked the tablet and saw the image on the right. I waited 10 minutes to see if her level improved – it didn’t – and went up to wake her to give her a few glucose tablets. Amy went straight back to sleep, I went downstairs happy that she was no longer in danger.
Twenty minutes later I was pleased by the 5.5mmol showing on the xDrip app.

Interested in further posts about this subject? Why not like this blog’s Facebook page and get notified of updates, or click ‘Follow’ using the button at the bottom-right of this page.


Interested in what components you’ll need to build xDrip? Then read this: #WeAreNotWaiting thanks to #xDrip – Components Required
Blogaversary 2 on World Diabetes Day 2014

Spinnaker Tower on World Diabetes DayIt’s hard to believe yet another year has gone by in the Diabetes world, here’s a little bit about what’s been going on.

But first, it’s my blog’s birthday; 2 years old today (well actually yesterday but let’s not worry about that minor fib). Its visits have doubled since the first year’s statistics: I’m pretty darn amazed with that. What really pleases me is that I can see from the stats that people have searched Google and found the answers in my site, that’s kind of why I started it in the first place.

In December 2013 my daughter Emilia decided to take part in the TrialNet study at Bournemouth. It was two long months before we found out her results (and mine) were negative which pleased us, although we were saddened to hear that a friend’s result was positive.

Christmas and Amy’s Diaversary (29th Dec) came and went and her 6 month old Animas Vibe insulin pump made life easier during the festive period.

Amy and KevEarly in the new year I started my shifts as a national peer supporter for Diabetes UK, answering phone calls once a week and helping people find solutions to problems, or giving them ideas from the experiences we’ve had in the family. It’s proved to be really rewarding.
AccuChekInsight1March was a whirlwind on a particular day, the 15th, which saw us have two back-to-back diabetes events, doing their impressions of buses and policemen (none around, then there’s two). The first was an education day held by the local Type 1 families group Seahawks where amongst many other things I got to check out Roche’s latest pump, the Insight. It a great event and I was sad to rush away from just after lunch. But rush we must as Amy was doing a sponsored Indoor Skydiving in aid of JDRF along with lots of kids we knew pretty well; she loved it, every minute of it.

dblogweek squareIn May I joined in with blog week and I remember how nervous I felt when releasing my poem for Tuesday’s entry: A Childhood All Gone. It turns out I needn’t have been so nervous and I think that’s turned out to be my most favourited/Retweeted/Liked blog post ever.

flatline-dayEarlier in March Animas got the green light for use of the Vibe pump with Dexcom CGM for children, something we’d be waiting for since June the previous year. One year after getting her pump Amy went live with CGM and what an eye-opener that turned out to be.

twitteravatarJune also saw me cycling 100km around London overnight with a group of friends in the Nightrider charity event, where my local group of 8 raised £2700 for JDRF. On the plus side the training for it and switching to a healthier diet has also seen me shed 1.5 stone.

My personal highlights for this last year though involve each one of my kids. First Amy spoke in front of hundreds of Paediatric Health Care Professionals in a transition chat set up by the wonderful Dr Kar from QA Hospital in Portsmouth. Secondly, it was Emilia’s prom and a combination of pride and tiredness (from Dad-taxi pick ups at 3am) made me quite reflective: The Forgotten Sibling.

Freestyle Libre – hypos, hypers, hype and hope

Hype

With Abbott’s Freestyle Libre launch at the EASD conference on Monday the excitement in the diabetes online community is hotting up, with some getting their hands on the device already.
(If you’ve not heard of Libre before perhaps read this: Abbott Freestyle Libre Flash Glucose Monitoring: no more fingerpricks?.)
The full facts about the product are not yet out but there’s quite a lot of rumours going around and the following seems to pop up all over the place:
– Cost, the initial starter kit will be £135 and will include two sensors which cost £48 each thereafter.
– Sensors, last for two weeks, no more, no less.
– NHS will initially not be funding Libre although there are funded trials going on and may well be special cases for individuals.
– Libre will only be available to 18 year olds and over, the kids licence will hopefully come along soon (I’ve heard that before).

Here’s a video from Abbott about getting started with a Libre, including inserting a new sensor which seems very easy:
httpv://www.youtube.com/watch?v=8cK046ORpog

Hypos & Hypers

We’ve started using CGM (continuous glucose monitoring) alongside Amy’s Animas Vibe pump to help with hypos and hypers. The CGM alerts whenever Amy goes high or low, Libre won’t do that.
We use CGM to get data to recognise patterns and make adjustments to Amy’s insulin pump’s basal profile. Libre will do that.
We experiment with different combo/wave boluses for different foods and view the results on CGM to see how to do it better the next time. Libre will do that.
In a hypo situation it’s crucial to know whether the most recent treatment of glucose is working and levels are coming up, CGM doesn’t react fast enough so isn’t used for this only blood checks will do. This will be interesting how Libre compares to Dexcom as Dexcom samples every 5 minutes and has about a 5 minute lag, so you could be up to 10 minutes out. Libre though samples every minute but what is it’s lag? If it’s close to Dexcom then it might be up to 6 minutes out, but if it’s closer to older CGMs it could be up to 16 minutes out.

Hope

Without seeing results of trials this product gives me hope for Amy’s future, hope that technology is moving so fast at the moment that even without a cure her life will be more bearable on a day-to-day basis, more hope that this will lead to lower HbA1c’s (without hypos/hypers) and no complications.
Day-to-day it might be able to relieve the soreness of her fingers.
During the night it will mean we can check her levels more easily when she’s asleep. She has a habit of lying on her pump which means I can’t get to it without waking her up.
I hope that this device becomes a mainstream alternative to fingerstick tests and NICE/NHS will fund it on the basis of a lot less test strips being used. I would also be happy to co-fund it like others in my clinic do for the Omnipod insulin pump.

Abbott Freestyle Libre Flash Glucose Monitoring: no more fingerpricks?

The information about Abbott’s Flash Glucose Monitoring seems to be getting stronger by the week with little snippets being released every now and then.

In summary
From what I’ve read and watched (and hopefully understood correctly) I take it that:

- Abbott’s Flash Glucose Monitoring will require a sensor to be worn for 14 days
- The sensor is factory calibrated and won’t require fingerstick calibration like normally CGM.
- No more fingerstick glucose checks will need to take place.
- There will be a reader which will be can be swiped over the sensor to get the current glucose reading.
And the killer selling point (from my point of view)
- The sensor stores the last 8 hours of readings, so swiping over it in the morning tells you what happened during the night. Priceless.


One of the most recent bits of information I’ve come across featured a video about testing whilst in a fast-paced job.

A world without fingerpricks?

So no more fingerpricks and no more sore fingers?
No more wondering what happened to blood glucose levels whilst asleep?
Parents being able to check their kid’s glucose levels during the night without waking them?
Adults being able to basal test during the night without having to wake themselves up and potentially altering the result?
Basal injections or basal profiles on pumps being able to be finer tuned.

But is it a replacement for CGM?

In a word, no, well not as such.
No, it won’t give any alarms about low or high glucose levels, or rapidly changing levels.
No, it won’t be able to do anything like the Medtronic pump’s Low Glucose Suspend mode which shuts off delivery of any insulin if their CGM tells it the glucose level is below a minimum level.
However…
As a family which has only used CGM for almost a month it would be good for us as the key thing we’ve been doing with CGM is to get the overnight basal profile correct for my daughter’s insulin pump. We’ve also been using it to see how different foods change glucose levels.
For these two things the Flash product would be great.

Pie in the sky? Make or break?

With the sheer volume of information coming direct from Abbott themselves it’s hard to see that this could be pie in the sky. I’ve heard that Abbott expects Flash Glucose Monitoring to be at the core of their business within a few years and they’re rumoured to have told the stock market this, so it sounds like it’s a make or break thing for them.

The next announcement?

There will hopefully be a lot more information coming in the next couple of months leading up to Abbott’s symposium at 10am on 15th September at EASD2014 (European Association for the Study of Diabetes) in Vienna.
If you’re not one of the lucky ones whose able to be there you can register to view it online, like I have.

Pricing: the big question

Hopefully they’ll announce the date Flash Glucose Monitoring will become available and how much it will cost.
Hopefully it’ll be at a cost acceptable to the NHS – but I doubt it.
Maybe the NHS would partially fund it, with the people with diabetes (or their parents) funding the remainder. I’d be interested in doing this although I’m not sure how much I’d be willing to pay.


It’s fair to say I’m pretty excited about this.

A great start to using CGM to get the bigger picture

wpid-20140619_173616.jpgA few weeks ago on the 18th June Amy inserted her first CGM sensor. On the 12th July she took it off.
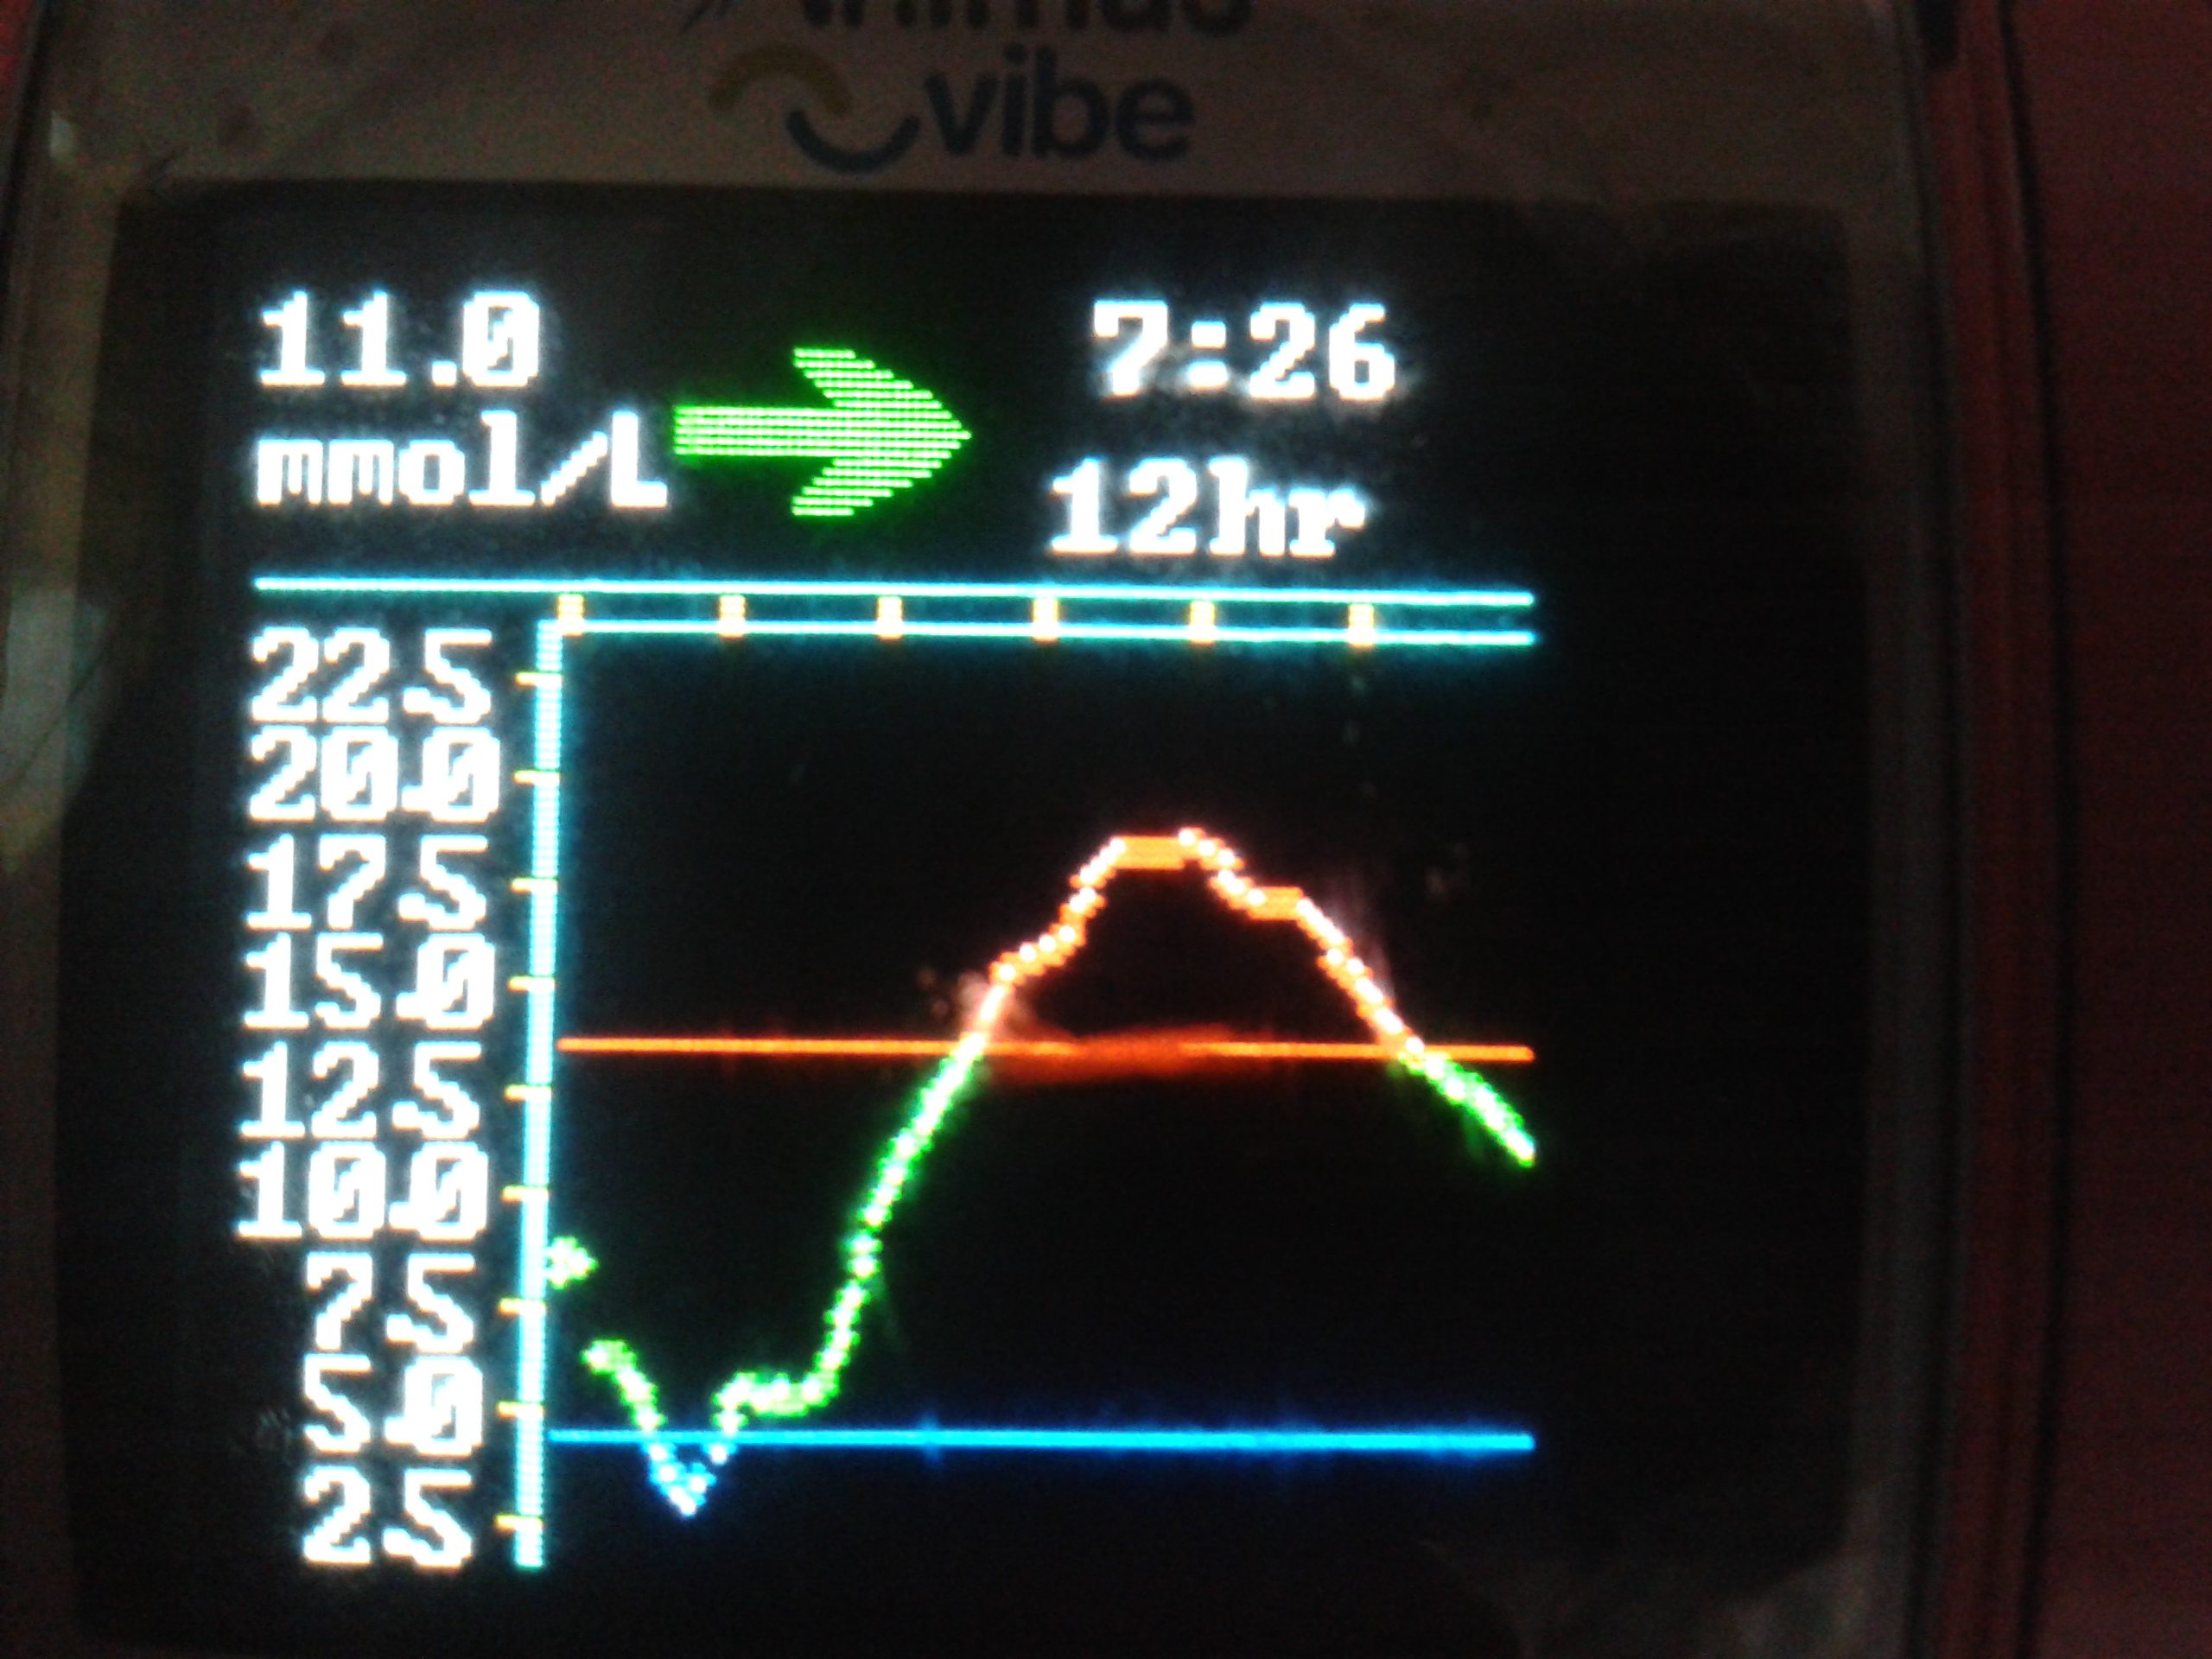
It lasted 25 days.

Initially it was very exciting seeing how accurate Dexcom was in comparison to Amy’s normal finger-stick checks, seeing those graphs, flipping between 1 hour graphs, 3 hours, 6, 12, 24.
Then it felt scary: how high she had gone after a meal, how high during the night, the fast dropping blood glucose levels, the lows after school.
Then it felt like we could put this information to use and start to alter Amy’s basal/background insulin levels. That is after all one of the key reasons we got it.

A screen full of information

flatline-day

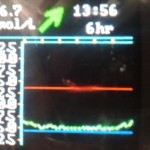
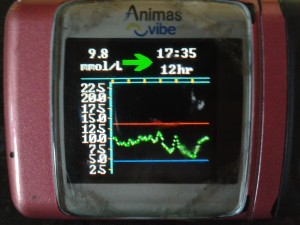
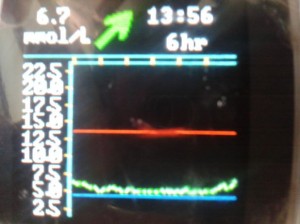
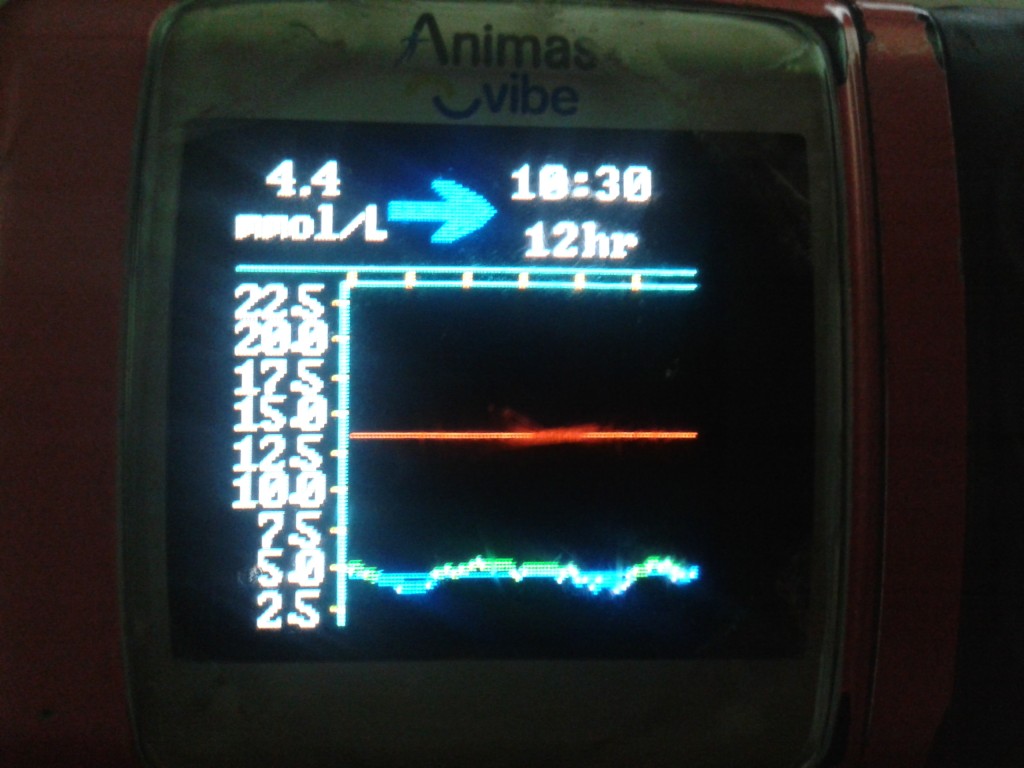
The screen shows a lot of information:
The red line is the level where Amy will get alerted that she’s ‘high’, we’ve set it at 13.3mmol/L.
The blue line is the level where Amy will get alerts that she’s ‘low’, we’ve set it at 4.4mmol/L.
The dotted green line is her CGM trace which believe me doesn’t often look that flat, it’s more like a section of the alps or England’s rolling hills.
So in the blink of an eye you can see it’s 13:56 and Amy is currently 6.7mmol/L and rising, steadily, because at 1pm (one yellow mark from the right) having slept in really (really) late she woke up and had lunch 30 minutes later.

An opportunity for experimenting and learning

Combo bolus (60/40/2.5hrs) for Rice/CurryCombo bolus (60/40/2.5hrs) for Rice/Curry
Some graphs don’t initially look very good at all, but they are as they’re always opportunities for learning. Take the one on the right, it’s a graph of us experimenting with eating a Chicken Xacuti curry and rice and giving a combo-bolus on the pump of 60% of the insulin immediately and the remaining 40% over 2.5 hours. It tells us a lot…don’t eat rice (joke).
From the graph we can tell that need to give less insulin up front so we’ll probably try a 40%/60% next time. We know this because she started at 6.5mmol/L and dropped to 3mmol/L(ish) within the first 90 minutes.

Analysing the averages

Unfortunately the previous graph isn’t too much use because at that time Amy’s basal/background insulin was wrong and her levels were high from 10pm until about 4am.
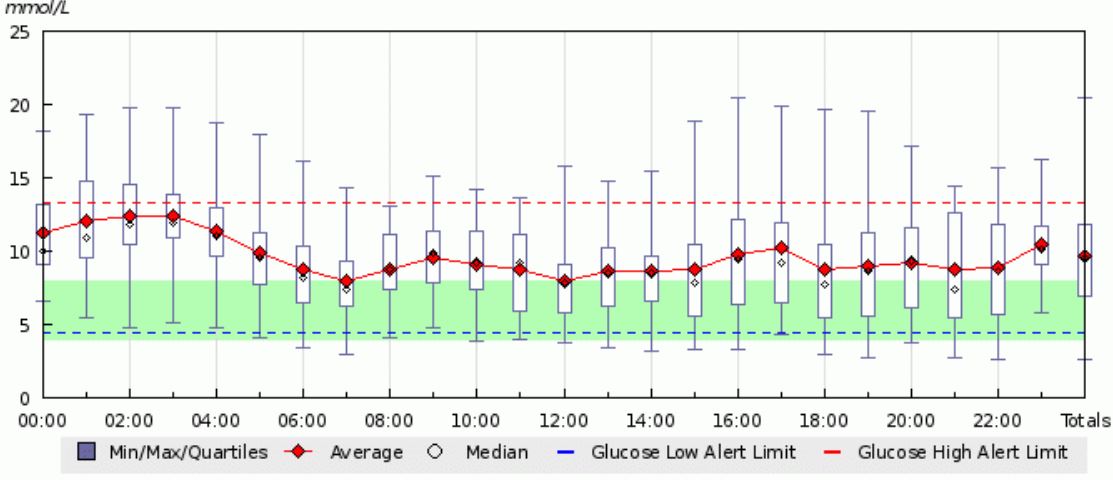
How do we know? We uploaded the CGM data to Diasend and analysed it, although at first it didn’t make us feel very good to see what was really going on:

diasend

That looks all very confusing but the two key things look at are the green bar (which is the magic zone of between 4mmol/L and 8mmol/L) and the red line which shows the average blood glucose levels for each particular time of the day.
It tell us we have a problem: she’s rarely in that magic range, her average is too high, she needs more basal/background insulin.

The foundations need some work

Deciding to focus on the night time of 10pm to 8am we didn’t do any changes to her basal profile for two weeks as we wanted to discuss the CGM results with the nurse at clinic. We all agreed on the changes required and then watched the next few nights’ graphs, making some tweaks here and there, before finally getting the graph below, although we’ll make sure she’s a little higher when she goes to bed from now on.
flatline

Portsmouth’s second SweetMeet – another privileged invite

amyprize2Amy shows off the carb counting scales she won at the SweetMeet
In the middle of a busy weekend – clinic yesterday, TeamBloodGlucose cycle ride tomorrow – Amy and I had an invite to the second SweetMeet organised by the team at Portsmouth’s QA hospital. For us it was another privileged invite being personally invited by Dr Partha Kar for the second year running.

Amy and I met Laura and Tanwen as soon as arriving, then with a breakfast bacon butty in hand had a nice chat JDRF’s Sue and DRWF’s Lee. Helen the pump rep from Roche was there and to our surprise our Animas rep Emma arrived, pleased to see Amy and to hear that she was getting on well with her Dexcom CGM, which Emma trained us in only two weeks ago. It’s really lovely coming to events like these and knowing so many people, it’s like one big family.

Kicking off with a great team

SweetMeet2 was officially opened by Lisa who referred to herself as just a nurse before introducing the team who had given up their spare time. With the plan for the day read out Dr Partha Kar stepped up to start the day off, but before doing so he praised lead nurse Lisa for the dedication and hard work she puts in keeping the department running.

66 years and the future

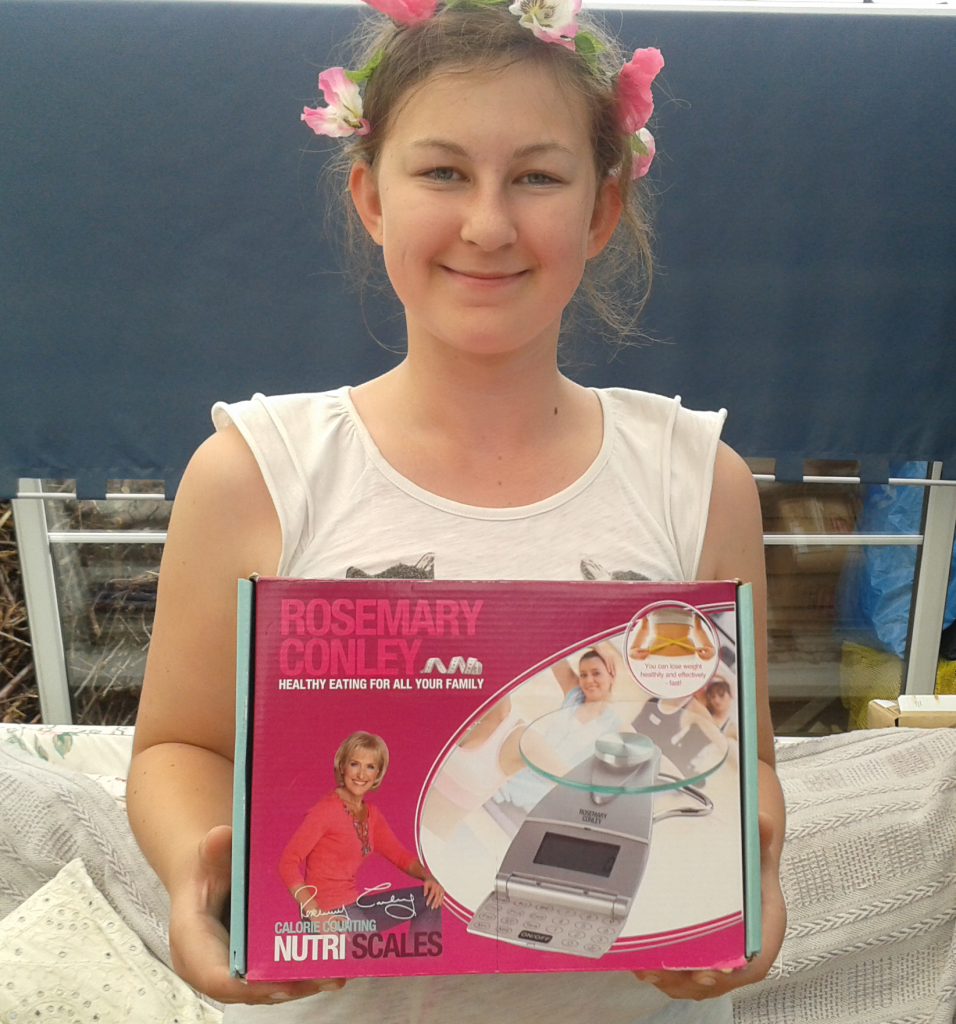
nhs creation leafletWith the NHS being formed 66 years ago to the day Partha outlined the changes in the NHS and in particular funding, explaining that funding had been matched to requirements from 1948 until a few years ago when funding plateaued, starting a funding gap which is unlikely to close any time soon. But there is hope and it will be found by making sure the right people perform the right jobs, freeing up the Wizards (Consultants) by getting the Gatekeepers (GPs) to perform the tasks they can – these references coming from Nigel Mathers and Paul Hodgkin’s 1989 story about the NHS “The Gatekeeper and the Wizard”
Speed-dating with the professionals

Next up it was time to speed date with the professionals, with the audience staying at their tables and professionals moving around the round to ask/answer questions during each 7 minute slot. Seven minutes goes very quickly when questions are being asked and it’s amazing how much you can cover during that time.
The podiatry and retinopathy sessions explain a lot about the processes that we know very little about and gave answers about what you should expect (nerve tests on bottoms AND tops of feet) and by whom (GP surgery nurse).
Partha did a session and an important message came across: people can and should help themselves, a message I’ve lived by since discovering the #DOC (Diabetes Online Community). The bigger question though is how to get those not already engaged to become so as those at the SweetMeet were clearly engaged already.

My favourite speed date

My favourite speed date – this sounds awkward 🙂 – was with Dr Iain Cranston, who chatted about Abbott’s Flash Glucose Monitoring, something I’m looking forward to being announced officially in September at EASD in Vienna – like many I’ve had an invite to go but can’t quite justify it. It has the potential to revolutionise finger-stick tests as it promises to do away with them, instead relying on swiping a NFC device across a sensor which is changed every two weeks. I didn’t think much of this technology initially but when I realised that it stores the last 8 hours of tests I realised it could be used as a non-alerting CGM, which is just fantastic. Fantastic that is if Abbott pitches it at a price to rival meter strips.

Breakout session 1: are all carbohydrates equal?

This year saw the introduction of two breakout sessions, with Amy and I going to the one of carbohydrates.
With a session of 45 minutes, 15 people and two dieticians it was like being a kid in a sweet shop, although obviously the first rule of SweetShopClub is that you don’t talk about sweets in front of dieticians. 🙂
Starting off with some simple carb-counting we moved on to GI which raised some interesting discussions, based bolusing for low-GI and wave bolusing techniques for pump users.
It was the first time I’ve been able to talk sensibly with a dietician about LCHF (low carb high fat) diets, their effect/usefulness and more importantly whether they’re suitable for kids, or can be adapted to be so.

Breakout session 2: new developments for type 1 diabetes

Dr Iain Cranston held our second breakout session which started with us all stating the new developments we wanted to know more about. With islet transplants and stem cell research already on the board (two things which could go hand in hand to get people off insulin) I offered a couple of other things: smart insulin and inhaled insulin.
Dr Cranston’s knowledge of developments is great and filled us all in on each of the developments, answering my questions about beta-cell replacement whilst super-T cells still exist.
How often do you get the chance to ask questions like this, that’s the beauty of something like the SweetMeet. I have a feeling that if the allocated time hadn’t run out Dr Cranston and I could have chatted about stuff like this for hours.

A patient’s experience: educate yourself

Lee Calladine, spoke about his life with Type 1 diabetes which he was diagnosed with aged 33. As DRWF’s Event Organiser Lee organises events such as the DRWF Wellness Day South which I attended two weeks ago as well as last year.
Lee’s message fitted in nicely with Partha’s: educate yourself, find out about your diabetes and your gains will be great. Since educating himself Lee feels more in control, has got his HbA1c lower and minimised his risk of complications and that’s something we all want.

Thanks Sue

The second SweetMeet was a huge success in my opinion and Sue, one of QA’s dieticians, should be thanked by all who attended for organising a great event. Well done Sue, we really enjoyed it.

And finally, Amy wins another prize

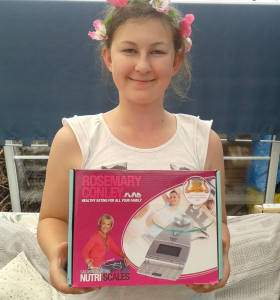
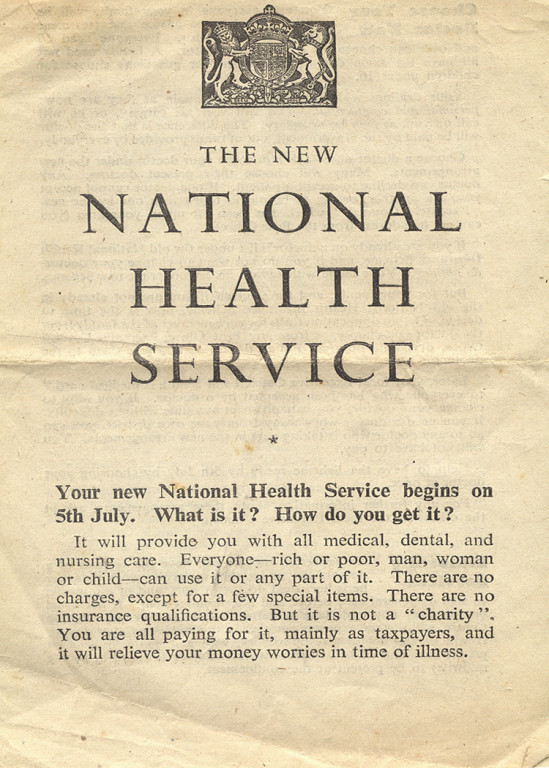
At last year’s event Amy won a bottle of champagne in the carb counting quiz, which of course was commandeered by myself and consumed shortly thereafter. With high hopes she entered this year’s quiz and alongside a few others won another prize, this time a set of Rosemary Conley Nutritional Scales which will hopefully be very useful for carb counting.
Here she is with them:
amyprize2

CGM: we’re live with Animas/Dexcom

pink-vibe-sniggerOn Wednesday last week, Amy fitted her own Dexcom CGM for the first time, going live with something she’d (and we’d) been looking forward too for almost a year, 363 days in fact since she got her pump on 20th June 2013.

It was back in March that Animas announced that they had got the licence to sell Dexcom kit for use by kids aged 2-18 but communications dried up and on an off-chance call to them back in May I managed to purchase the kit required: 4 sensors and 1 transmitter at a cost of £500. Typically since we’d been waiting the price had gone up £50. We could have purchased CGM through another reseller for more money and got it a year ago but I wanted the support from two important people, our clinic and Animas. Ultimately I feel this was worth waiting for but I wonder how much support we’ll actually need.

Trying to be prepared I researched what else we might need for the CGM and purchased some funky pink Camo Rock Tape (thanks Rachel), some SkinTac (thanks Carolyn/Shaun) and importantly TacAway too. Another parent suggested that we start without using these things as we needed to make sure Amy wasn’t allergic or sensitive to the Dexcom adhesive.

Amy with new sensorFitting day arrived and all four of us went to meet our rep Emma at the hospital, along with 2 DSNs and a student nurse. As well as being the first people at clinic to have an Animas Vibe it turns out we’re the first to get Dexcom too, so our DSNs were keen to find out all about it. It’s great to have their support.
Emma explained about the kit, showing demo pumps and we went through our expectations of CGM, with Amy saying all the things Emma and the DSNs wanted to hear (spot patterns, basal checking, alerting). Normally Emma would show people some videos about sensor insertion but Amy and I had already watched the great sensor insertion videos by Diabetic Danicaarm insertion video here – so we skipped that part.

With a demo/fake sensor inserter Emma went through the routine slowly for all to see. Within minutes Amy was doing it although as it was the first time she asked Jane to do the initial plunger part. With the transmitter clipped in to the sensor Amy set up her pump to recognise the transmitter and all the other CGM settings (alerts, sounds, ranges).

Amy said the the sensor insertion was easy and painless, although she could feel something it wasn’t painful.

Then it was a case of waiting for two hours until it was time to do the two start up calibration blood checks, something you only do each time you change the sensor. Whilst waiting the Vibe gives you a count down meter which Amy kept checking during the next two hours, keen to calibrate and see her BGs on the screen. The two hour mark came just as we were waiting for the Park&Ride bus to turn up; Amy got out her meter, “no Amy let’s wait til we’re back in the car”. But Amy didn’t wait, she did the tests on the bus and smiled at seeing her glucose level on the screen.

One of the reasons for getting CGM was to make sure Amy’s basal profile was correct whilst asleep, how about this for starters (although I doubt it will stay this good):
A sleeping teenager's basal profile

The wait is (almost) over – CGM, Animas, Dexcom and Kids

pink-vibe-snigger
Earlier this week I blogged about waiting for Animas to get their licence to sell Dexcom G4 for use by kids and how the Diabetes Online Document (#DOC) rumour mill was suggesting an announcement would happen soon.

That announcement was rumoured to be tomorrow at a symposium held by Animas at the Diabetes UK Professional conference in Liverpool.

But it happened today. On Animas’s stall in the exhibition area sat an Animas toy kangaroo wearing a badge which said:

Animas Vibe & CGM system
NOW APPROVED
for children aged 2
years & older

One of my Twitter friends let me know the exciting and now official news:

Making the call to Animas

At lunch time I contacted Animas (0800 055 6606) to try and register for, or buy if possible, the newly approved CGM.
“Hello, I’d like to buy CGM for my daughter who uses an Animas Vibe, now that you’re officially licensed to sell them.” The lady on the other end of the phone was surprised I knew about it but was happy to talk with me.
I was informed the launch date is sometime in April, not April 1st, or the end of April, just at sometime.
I gave my details to be kept on file for them to inform me when they had any news.

And the price?

Animas has had a starter kit deal for some time, certainly from June last year. For £450 that deal gets you a transmitter and a box of 4 sensors.
So I asked if that deal would be still on come April; the conversation went something like this:
Me: “And will the £450 starter deal still be on?”
Animas: “I’m not sure, currently that deal ends on March 31st”.
Me: “Oh great. Well, I’m happy to pay now and just wait until you can send the bits to me.”
Animas: “I’m sorry, we’re not in a position to do that.”
Me: “Oh great.”

Patiently Waiting – CGM, Animas, Dexcom and Kids

pink-vibe-snigger
In May 2013 we chose Animas for Amy’s pump for many reasons, one of which was that in the future we might like to get CGM (Continuous Glucose Monitoring) and Animas’s in-built CGM display unit would make using CGM cheaper – because we wouldn’t need to purchase Dexcom’s own display unit.

Continuous Glucose Monitoring? What’s that then?

A CGM system consists of a sensor which is worn on the body and has a small wire just under the skin which constantly senses the glucose in the interstitial fluid. This sensor connects to a transmitter which sends data to the receiver – in our case this will be the Animas Vibe insulin pump – which can show the user what their glucose level is like. It’s important to know that as it checks interstitial fluid and not blood that the glucose level can be up to 15 minutes behind the actual glucose level.
The Animas Vibe links up with Dexcom’s G4 system.

CGM, an expensive option

There’s no doubt about it CGM is expensive.
One sensor costs between £45 (Animas) and £62.50 (third party resellers).
Doesn’t sound too bad does it, but then again it’s only guaranteed to last one week. ONE WEEK!
If you used it full time, one sensor per week, plus needing two transmitters per year you’d be looking at paying over £3000 and that’s using the cheapest pricing available.
Luckily some manage to get their sensors to last a fair bit longer than that, bringing the cost down dramatically, but then again that’s going against the advice of Dexcom so I’m not suggesting anyone does it. You don’t have to use CGM full time, you can use it for as long as a sensor lasts, then take a break before put a new one on.

Does anyone really need CGM?

It’s a good question. Many health care professionals would say no, for many reasons. They’re definitely worried about the psychological effects of yet another thing to do for diabetes and I can understand this.
Twenty, possibly even 10 or 5, years ago people weren’t using CGM so why do we need it now?
I guess the truth is that we don’t need it now: by understanding how your body reacts to glucose, insulin, stresses and exercise (etc.) some people can really do well to avoid highs and lows, but doing this takes a lot of effort.
Some people will have a clinical need to use CGM; Amy isn’t one of them.
On the other hand CGM will tell you what’s going on with your glucose level throughout the day, alarming you when you go out of range. It tells you if you’re going up or down or not and it shows what’s been happening over the last so many hours. It effectively performs Basal Tests each and every night something which is done by many pump users or their parents.

Dexcom G4

If you’re in the UK you can purchase sensors, transmitters and the stand alone display unit for Dexcom G4 from third party resellers.
You can do this if you want to use it as an adult.
You can do this if you want to use it for your child, if they’re 2 years old or more.
You don’t even need to get a letter from your hospital to say you or your child has Type 1 Diabetes.

Animas and their Dexcom G4 licence…for adults

Animas are licensed to sell Dexcom sensors and transmitters to adults in the UK. You don’t even have to be an Animas pump user to be able to buy sensors from them.
So if you’re an adult with an Animas Vibe you can purchase Dexcom sensors/transmitters and have CGM displayed on your pump.

Animas and their Dexcom G4 licence…for kids (2-18 years)

We were told in April 2013 that by the time Amy got her pump one month later Animas would have their licence to sell Dexcom G4 sensors/transmitters for use by kids.
It’s never arrived.
We’ve been patiently waiting.
We’ve been getting frustrated at the waiting game.

Where’s the logic?

In the UK anyone can buy Dexcom G4 sensors/transmitters, whether it be from Animas or a third party reseller.
In the UK an adult can buy their Dexcom G4 sensors/transmitters direct from Animas.
In the UK a parent can buy Dexcom G4 sensors/transmitters for their child from a third party reseller.
In the UK a parent CANNOT buy these same things from Animas for their child.
Where’s the logic?
As a computer programmer this drives me mad.
Clearly there’s more to it that I don’t know about.

Finding an alternative method

I’ve been very keen to buy through Animas as their prices are so much lower and effectively it means you can get 11 sensors for the price of 8 bought from a third party reseller. As one sensor can last three or four weeks this means that you’d get at least two if not three months more of sensing by buying from Animas.
We’d been told that our hospital would not fund the CGM (fair enough, it’s expensive and there’s no clinical need) but they would help us talk with Animas. I don’t want to go into detail about this but it’s not happened, I’ve felt very unsupported in our quest and frankly it’s really annoyed me. Nine months after originally asking for support I’ve heard they’ve sent us a letter for us to send to Animas to hopefully prove their support for Amy’s case.
However maybe it’s all too late.

Is that a licence I can see in the distance?

The diabetes online community rumour mill has been working overtime recently.
There’s been talk of Animas holding a meeting/presentation/symposium at the Diabetes UK Professional Conference in Liverpool this week.
There’s been rumours that Animas may well be announcing that they’ve got their licence to sell Dexcom G4 products for kids (aged 2-18).
Recently a post on a Facebook group asked if anyone had heard anything.
They hadn’t.
It started a lot of posting activity, with people emailing or calling their Animas rep, or their Diabetes Specialist Nurse.
Whilst no Animas rep would confirm or deny anything one nurse may well have let the cat of the bag.
It seems quite likely that this week the announcement will be made that April will be the launch date.
But we’ve been here before with rumours of licences and dates so I’ll take this ‘news’ with a pinch of salt.

Of course I really hope this rumour is true.

Guest blog by Victoria Ruszala – Climbing new heights and making new mistakes

Preface by Kev: I truly believe travel broadens your mind but it’s easy to see why people with diabetes think twice. I know from our month long backpacking trip to India that everything is not plain sailing, but most issues can be overcome, or concerns minimised, with a bit of planning.
The backpacking trip however was not my original plan: we were due to go to Ladakh, crossing the Himalayas over two days, sleeping at altitude and risking acute mountain sickness (AMS). I got scared at trying to manage diabetes and AMS and immediately changed our plan to avoid the mountains, something I very much regret.
Victoria is the first person with type 1 diabetes I’ve communicated with who’s tackled altitude, so I was keen to hear her travel tales.
Anyway, get yourself a drink and sit back and read about Victoria’s amazing trip to Borneo, climbing Mt Kinabalu and how having Type 1 Diabetes did not stand in her way.

Climbing new heights and making new mistakes
by Victoria Ruszala

When Kevin asked me to write this blog post I thought – really? Why would anyone want to know about my holiday experiences? Then through lots of contacts on twitter I realised that what I do really is seen as exceptional by some people. It’s that that has me penning my random thoughts today, that and the idea that if people read this they might be convinced that the world is waiting for them….
I was diagnosed aged 9 in 1991. To save you all the maths I am now 32 years old. It may surprise you to realise that back then cartridges hadn’t even been invented – I used insulin syringes and vials for the first two years! However over time (thankfully) technology moved on and I was put on a basal bolus regime aged 11 (the youngest in my area at the time) and it stayed that way. I do now have a pump, but I have only had it for 3 years so I understand how difficult it can be to travel with different kinds of insulin regime.
My parents always took me on holiday every year to Spain or Portugal. They had the attitude that diabetes wasn’t a problem, just a challenge to overcome. This has stood me in good stead all my life – if I plan everything properly then nothing can stop me. However I never went further afield than Europe until I was 26 years old. This wasn’t fear – it was just a lack of interest! It wasn’t until I met my (now) husband at university that I met someone who convinced me to try a real adventure. Si had been travelling throughout his gap year and had continued during uni too. He was cool about my diabetes and because we met playing ice hockey (that’s a whole different story!) he didn’t see why I couldn’t do anything I set my mind to. It did however take him another 4 years to convince me to really go for it.
I was nervous about this and so set out some ground rules. Si is a real ‘turn up with just a ticket’ traveller and the very idea of this drove me crazy – how could I possibly plan meal times, insulin dose and treat hypos and hypers if we didn’t have an idea from one day to the next? So the compromise was that we would go somewhere ‘out there’ but as part of an organised group. We chose Borneo with Intrepid– mainly because I wanted to see orang-utans and because he loved the jungle and had never been to Asia. This was the best decision I could have made – it took the pressure off of me to ‘organise’ the trip and allowed me the space I needed to focus on insulin and food. It also meant that if I was concerned about my health at any point there was a contact who knew how to access healthcare. I would certainly recommend this approach if you have never been anywhere particularly extreme.

There was a particular part of this trip that really excited Simon – climbing Mt Kinabalu (4095m). One thing I forgot to tell you about Si – he’s an extremist when it comes to sport. I on the other hand am much happier with a glass of wine (sorry mum/dr) and a good book. At first Si said I shouldn’t do it. I think this was a cunning ploy on his part, as the first thing that happens when I’m told I can’t do something, is become determined to do it! So this is where the preparation part kicked in. I researched altitude and diabetes ….. and came up with nothing. Diddly. I couldn’t find any real information anywhere apart from RunSweet which gave profiles of people that had climbed mountains. This told me 2 things – it could definitely be done and it would be up to me to work out how my own body responded. I therefore got sneaky.
I am a clinical pharmacist – I work in a hospital and therefore have access to a number of healthcare professionals. They put me in touch with Professor Chris Byrne who was carrying out a trial on the effects of exercise in T1DM. I managed to convince this eminent professor that lending me his super expensive continuous glucose monitor and activity monitor equipment for my 5 week jaunt in Borneo was just what his trial needed! The CGM would give me the confidence for the mountain climb – I didn’t know what my sugars would do and this would tell me the trends rather than just single point readings, which would allow me to adjust my insulin and food safely.
The other bit of preparation I did was get equipped at climb-fit.com and get fit. So I went to the gym a few times and walked to work. Seriously that was my training (to be fair it was bloody hard work to get to the top of the mountain and if I had known I would probably have put a bit more effort in. Hindsight is a wonderful thing). I also spoke to the dietician and asked for advice about what food to take to help on the climb. They hadn’t really had any experience of this so together we decided that cereal bars would provide a good amount of energy and glucose (we were going to have meals on the mountain so wasn’t massively concerned – it was more hypoglycaemia that I was worried about). This advice has proved invaluable on all of my travels – they pack easily, they don’t overtreat the hypo and cause rebound hypers and its easy to get more of them, even in remote countries. I would advise anyone travelling to have a few to hand.
We went to Borneo and had a whale of a time. As usual (I knew from my previous experiences) the hot temperature and humidity caused my CBG to drop. So I reduced my Lantus by a few units. The Asian food was a nightmare to carb count – but once I worked out there was pretty much sugar in everything I just guestimated and usually it all worked out ok. I had a few hypos but I suspect they were more beer related than any real issues! And then the day of the climb loomed. The night before, I had taken the radical decision to only give myself half the usual amount of Lantus. I did this for 2 reasons – walking up a mountain was lots of exercise and therefore I wouldn’t need as much insulin right? And I was terrified of going hypo and falling off the mountain. I figured that if I got high I would just give myself extra Humalog. The morning dawned and we were given a cooked breakfast before we set off. I then made my second radical decision – I wouldn’t have any insulin for this meal. It was mainly fat rather than carbs (one hash brown and some baked beans) and my CBG was 10mmol/l. As I was sure the exercise would burn it all off, I figured it would be fine.

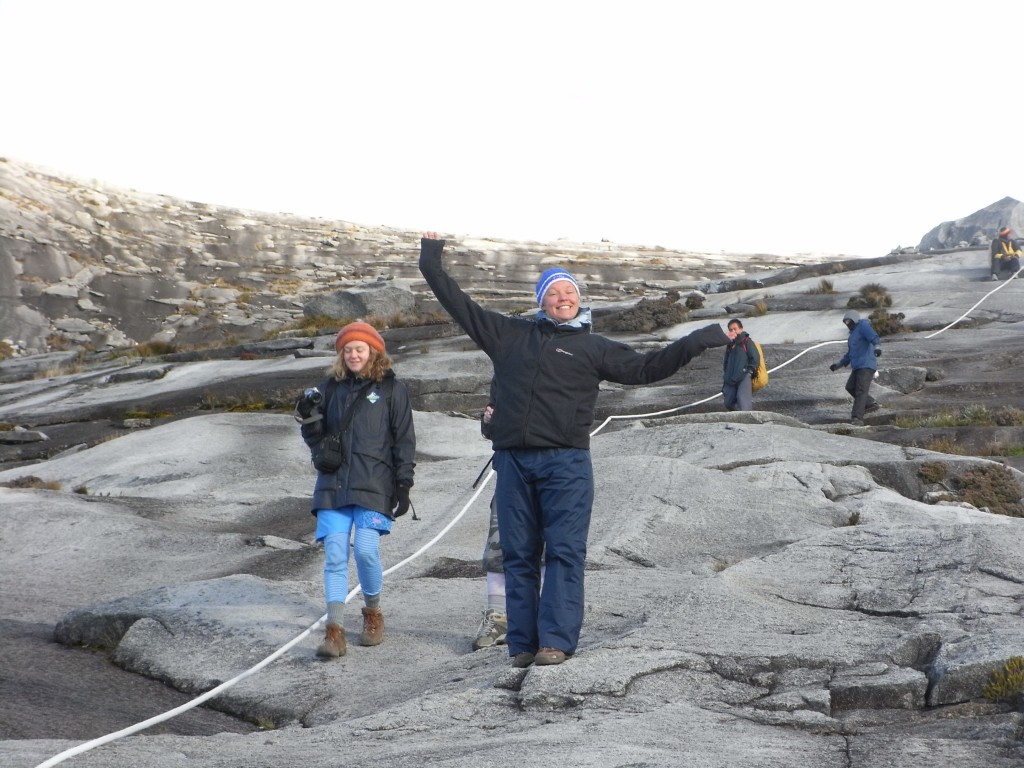
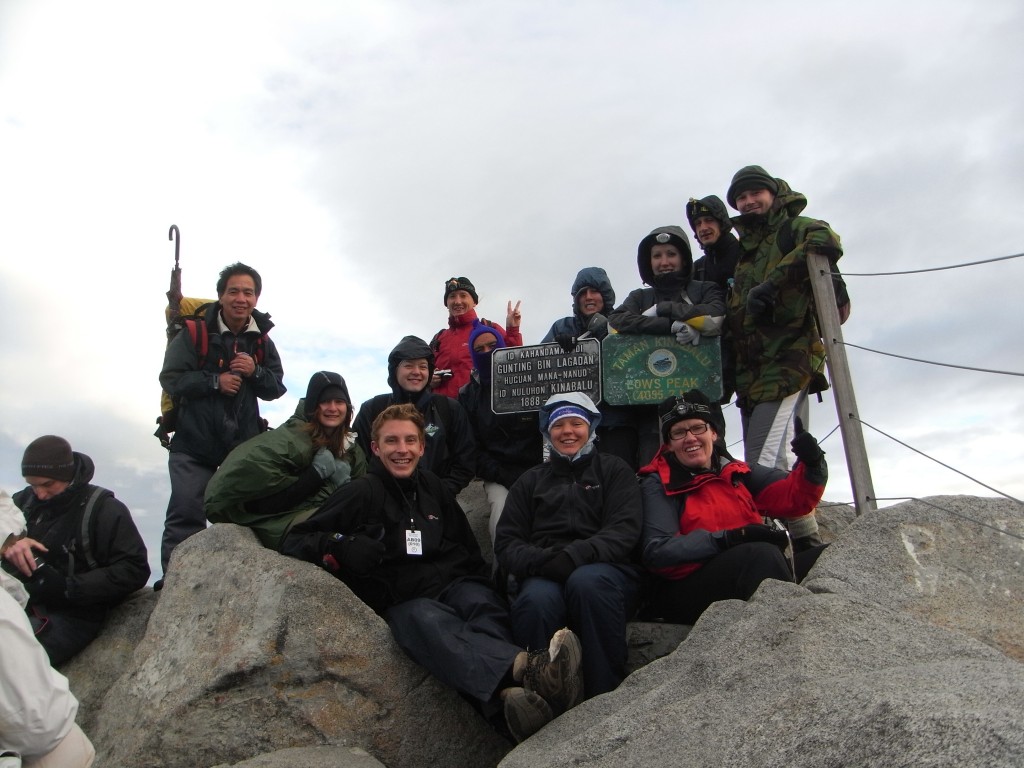
Victoria on the mountainVictoria on Mt Kinabalu

At first it was fine. My CGM showed my sugars were about 12 and I figured I was well away from any hypo danger. Then they started to go up. Then a bit more. Then a lot more. What I had failed to take into account was adrenaline. I know this now, but then – well this was me finding it out. Adrenaline will cause your sugars to rise rapidly. Your body is getting ready for fight or flight so your liver kicks out sugar for your muscles to use. But as a diabetic you don’t use it. So you just get higher. And higher. Combined with my genius plan of no insulin and halved basal, this resulted in a rapid rise to 27 mmol/l after 3 hours. I could see from the CGM that it was still trending up so I thought – no problem I’ll just have my breakfast insulin. Then it continued to rise to 29 mmol/l. ‘eek’ I thought and injected some more. The CGM stopped measuring at 35mmol/l. My CBG monitor had read Hi for an hour before that. I was feeling very odd and quite sick. I was clearly going into DKA at 2500m.
I then made yet more bad decisions. I actually didn’t tell anyone what was happening, I kept climbing higher and Si wasn’t with me as he had chosen to take a different trail with some of the others in the group (another genius plan that we haven’t repeated since). I gave myself a total of 54 units of insulin in a 4 hour period. Not much for some but I usually have 45 units in an entire day, including my basal. The CGM gave me the confidence to keep injecting – if it was still trending up I was still in trouble. I just kept injecting until the trend started to go down. It also helped that I was drinking huge amounts of water to combat altitude sickness and dehydration – so I never quite reached a point of collapse. I got away with it – by the time it got to lunch my sugars had fallen to 15mmol/l. I gave myself yet more insulin, had lunch and kept on climbing. My sugars stayed at 10ish for the rest of the climb to the ‘rest house’ at 3270m. I had dinner (proper insulin again, BG 15mmol/l!) and went to bed ready to begin the summit at 1am. I woke up 2 hours later with a hypo of 2.8mmol/l. This was my second learning point – exercise effects don’t stop when you do. When the activity monitor I was wearing for the trial was analysed back in the UK it actually showed that the effects lasted for 24 hours after I had stopped exercising. I never knew this and I’m many others don’t as well.
The summit was relatively uneventful – I made it to the top for sunrise. The CGM worked fine but my regular monitor (which I had to use to calibrate the CGM) went crazy. One minute it would read 26 the next 2mmol/l. I had to just trust the CGM which showed I was 9. I returned to the base camp, tired, exhilarated and full of new knowledge about my body. After that experience (and dealing with it alone) I actually grew in confidence – if I didn’t make rash decisions I understood my body well enough to try anything.
I have continued to travel the world, each time trying out a new challenge. Si and I now do it alone, although if I feel particularly nervous about some aspects we organise guided trips or groups to do it with. Here are my key learning points from my first climb at altitude:
• Altitude itself can force your CBG high or low – there is no way to predict
• Keep boluses roughly the same with about a 10% decrease – the amount your body needs for food stays roughly the same
• Test regularly – lots of factors are having an effect at the same time
• Have 2 different BG meters – none are tested at altitude and cold can affect reliability too
• Drink lots of water (helps AMS and DKA)
• Be brave with corrections – you may need more than usual.
• Exercise and altitude can have an effect for up to 24 hours so keep close eye on sugars for at least another day
• Be self-aware – you know how you react to things in normal life and it won’t change that much

Victoria and Si at the topVictoria and Si at the summit of Mt Kinabalu